You all know I LOVE to change things up with my patterns, right? This is one of the best things about sewing- slight changes and getting a new look. Well in this circumstance, this is actually how I originally made the bucket bag! But I changed it to the one long handle because it was more practical (behind the scenes talk!) for beginners and easier to explain.

But last week I decided to revisit this version and look at it with fresh eyes. I think the problem was that I was making a complicated handle and that just wasn’t necessary! I also was adding too much interfacing and that wasn’t necessary either 🙂 . In this version I used a sturdy black cotton webbing handle that is 1” wide. Not sure where it came from!
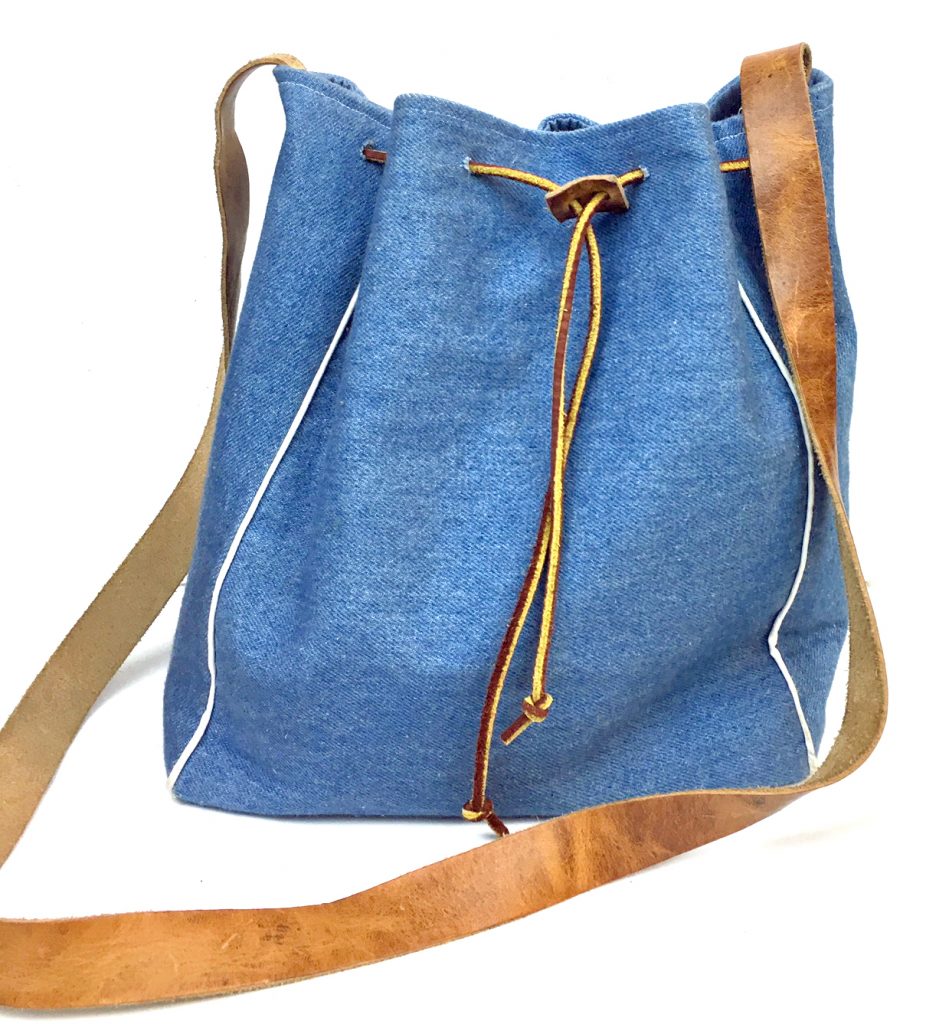
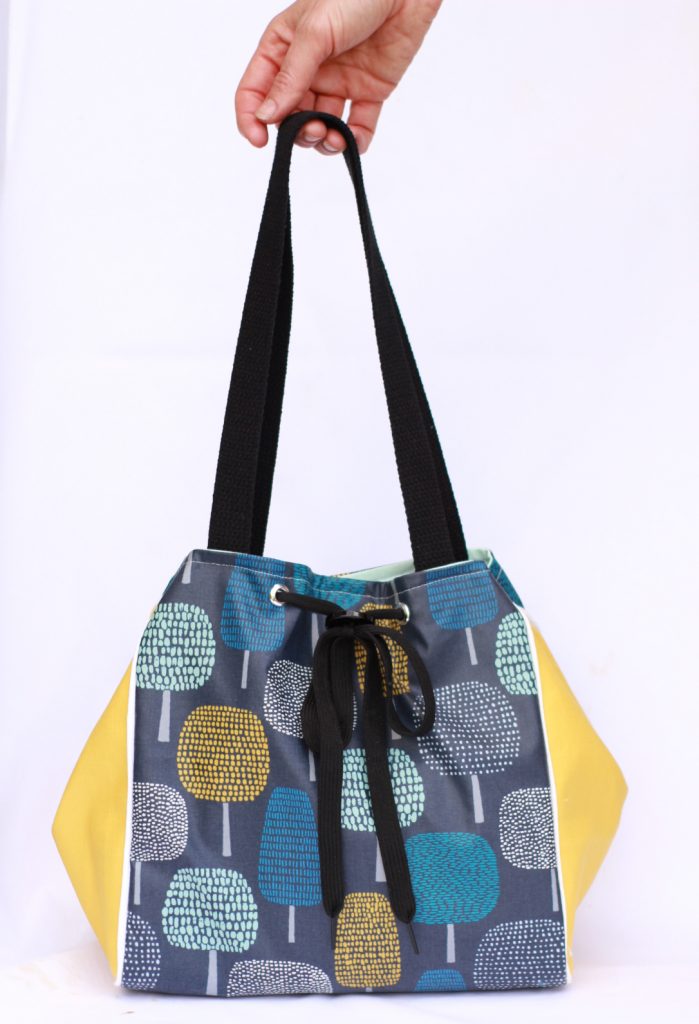
SO, what is the difference with this bag? First, 2 shorter handles instead of one long one. I made my 2 handles 28” long. Second, I added a magnetic snap to the center of the bag. Third, I only used 8 eyelets instead of 12! Isn’t that cool how it changes how the bag is gathered? Here is the regular bucket bag and then this version…
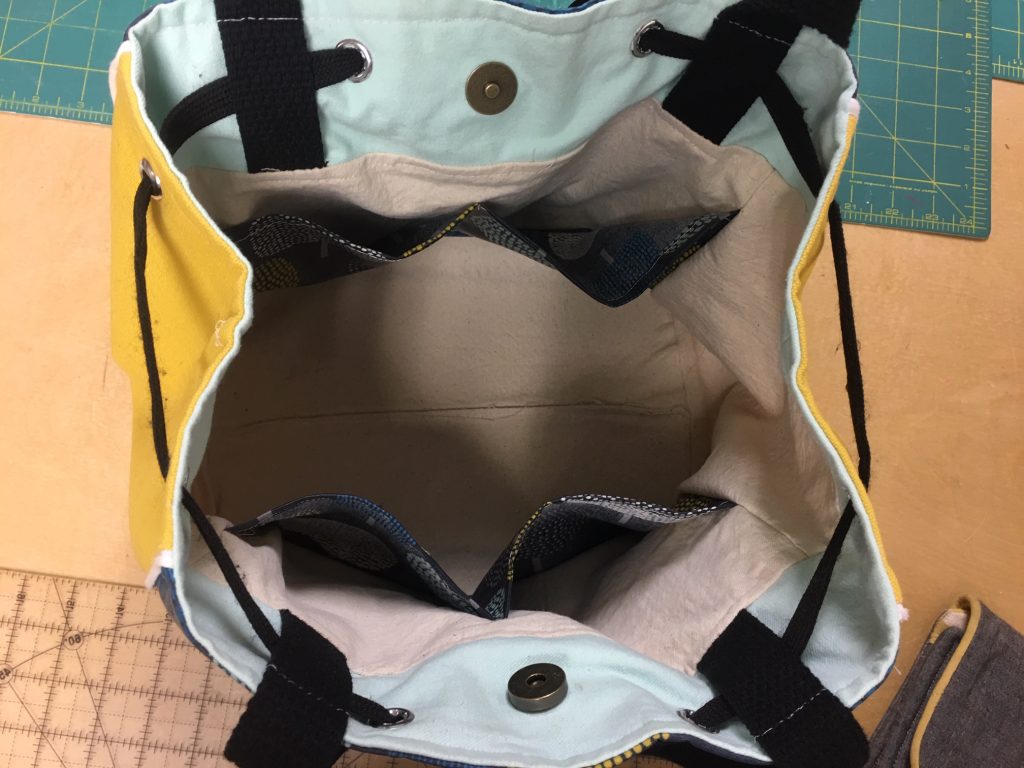
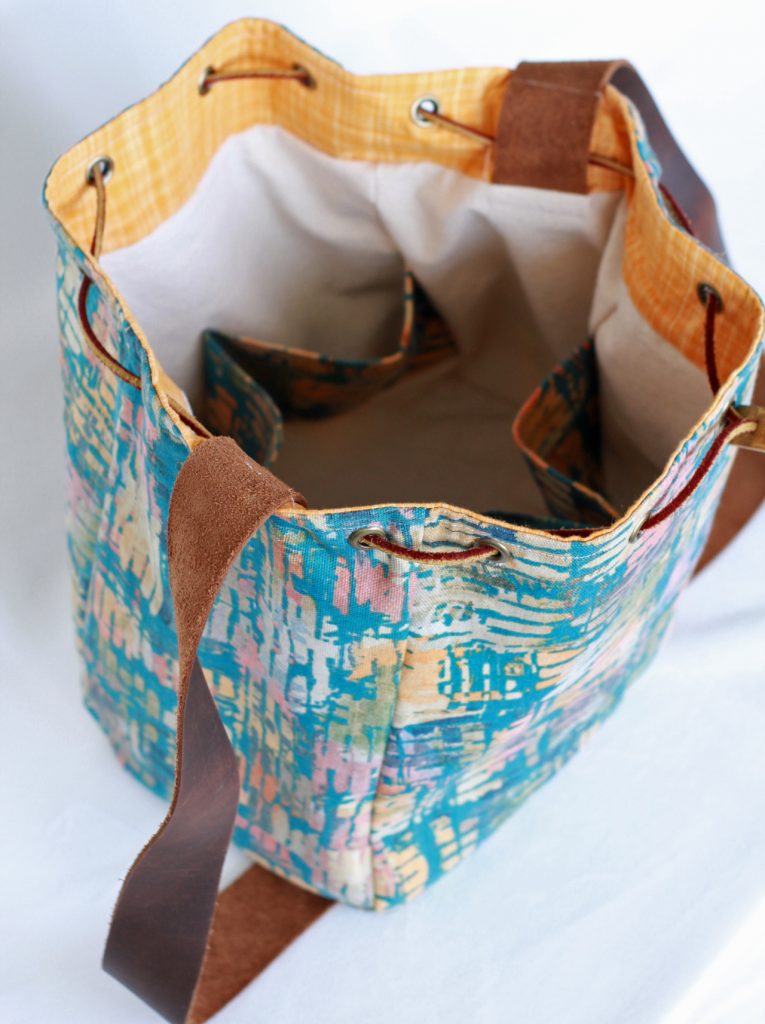
Here is the inside of this version and the inside of the regular version so you can see the difference…
I am going to show you a few instructions below to change your bucket bag pattern to this version. This will work best if you have read through the original bucket bag pattern first. You can purchase that pattern HERE.
The lining is the same except for the handles and snap, but decreasing the number of eyelets, changes the gather. The result is a much more structured looking bag since it only pulls the sides together instead of the front.
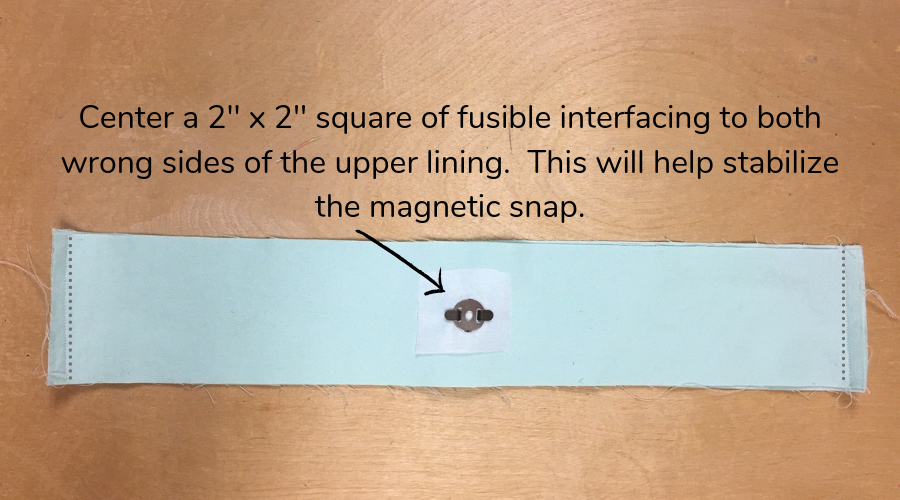
Add the magnetic snap using the manufacturers instructions. This photo below shows how I added the snap to the upper lining of the bag.
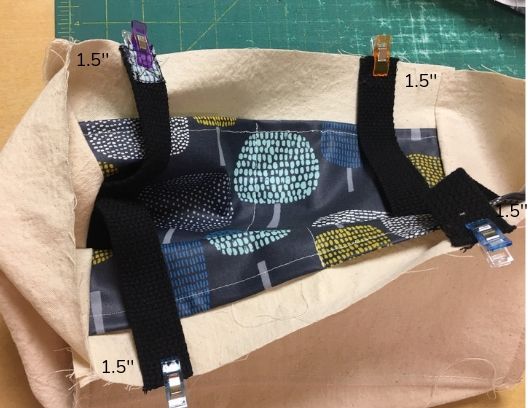
And this one below shows you how to add the handles. Baste the handles in place 1.5” from the side lining seam. Above the lining pockets. Being careful about this placement helps to get those handles looking good! After you baste the handles, continue following the pattern instructions to finish the lining.
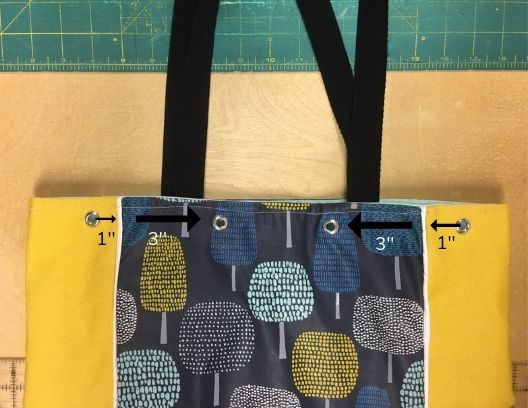
You can see the new eyelet placements below. The eyelets in the side exterior (yellow fabric) are 1” from the seam to the center of the eyelet. The eyelets in the main exterior fabric are 3” toward the center from that same seam. Do the same measurements on the other side of the bag.
The last thing I did that was different was to add a 6” x 10” piece of pellon flex foam to the base of the bag. I simply slipped the flex foam in , with the fusible side facing toward the lining, before I closed up the lining opening. It stayed in place pretty well while I closed up that opening with a top stitch on my sewing machine. But, you could hand sew it closed if you are concerned with shifting. Then, making sure the flex foam was in the right spot between the lining and the exterior, I took my iron and inserted it into my bag and pressed. My iron is regular size and fit in there nicely! This step attached the lining to the fusible side of the flex foam.
The flex foam is optional! The bag still looks great without it but the bottom sags a little- more like the bucket shape we are going for with the original version 🙂
Here are some more photos of the completed dressed up bucket bag…
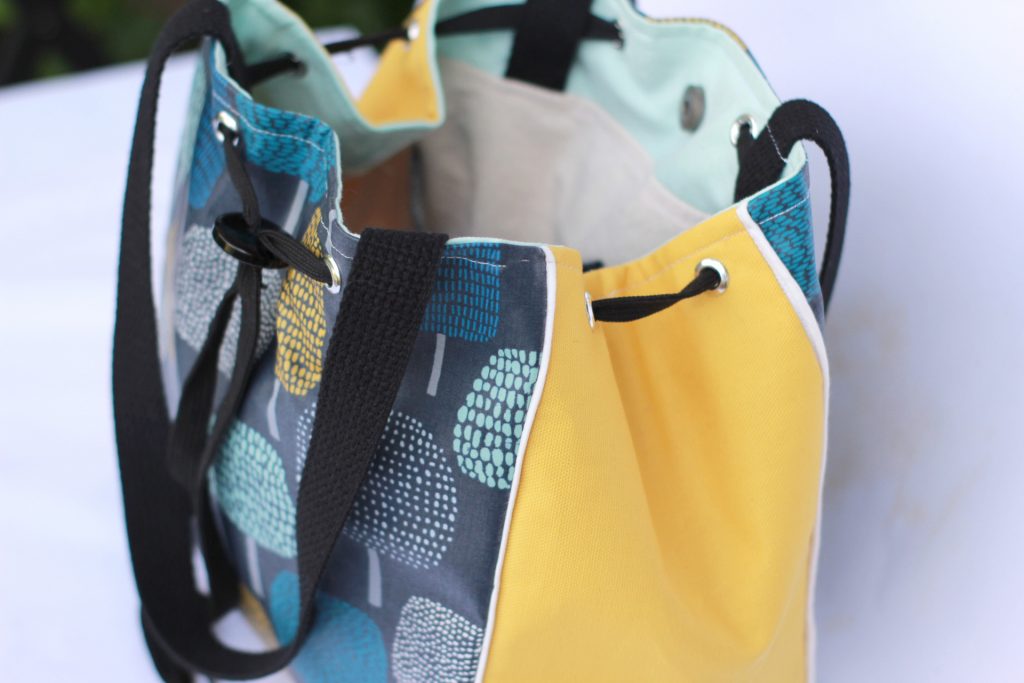
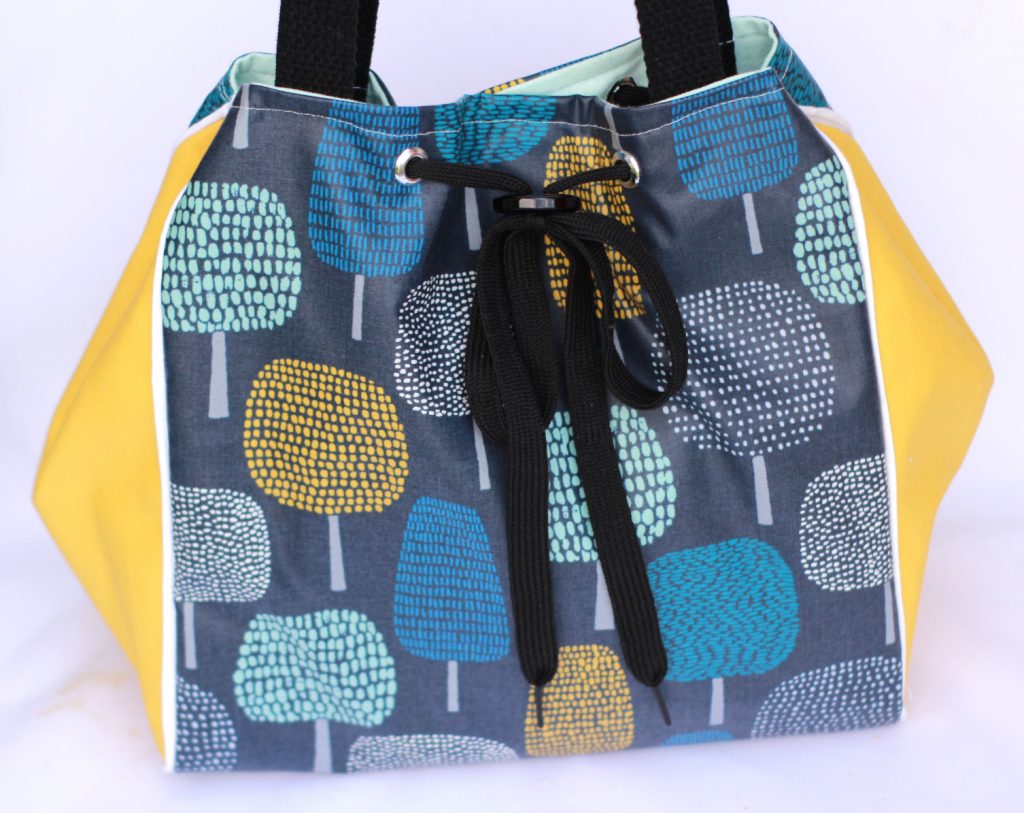
You can see that I also added piping to the exterior main body. With this style it really frames the bag nicely! Also, in this version, it’s nice to make your side pieces a different fabric! Finally, I used a SHOE LACE for the tie! The shoe lace section at the store might be a great place to find some cute cording for the buckets bags in my future 🙂 . The stopper is just a large place button. The trees fabric is a matte laminated cotton by Cloud 9 fabrics. It is a DREAM to work with! The yellow sides are duck cloth from JoAnns.
I hope you liked this version of the new Bucket Bag Pattern! Let me know if you have any questions in the comments below…