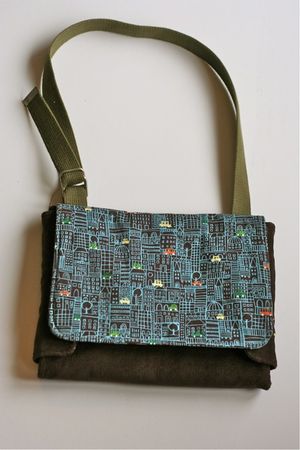
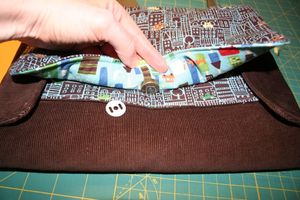
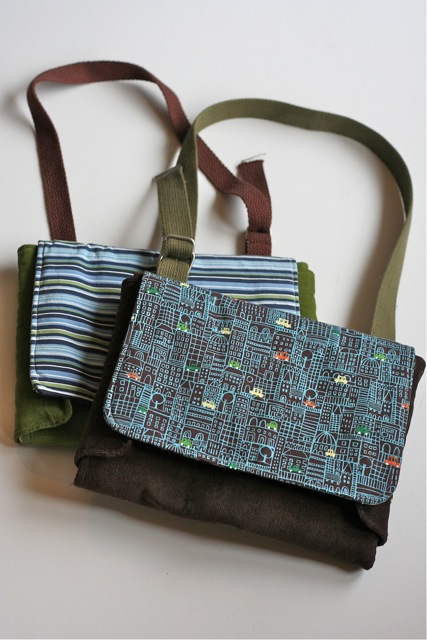
I am still attempting to sew for my boy. He loves tools and tractors, rocks and sticks, trains and fire trucks. Here is a project that has piqued his interest and has him playing quietly for a few minutes at least!
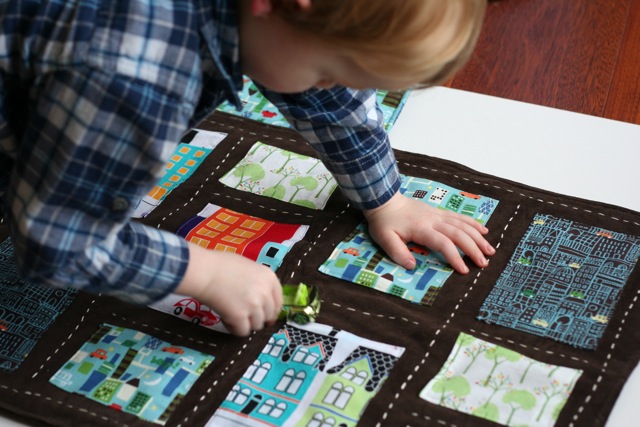
Mommy likes it since it folds up to be a stylin' accessory. I know we will be able to pack up a few cars and take it with us when we go visit friends too. Since the layers of the play mat fold up, you could even pack a spend the night at grandma's in there if you don't have to bring too much!
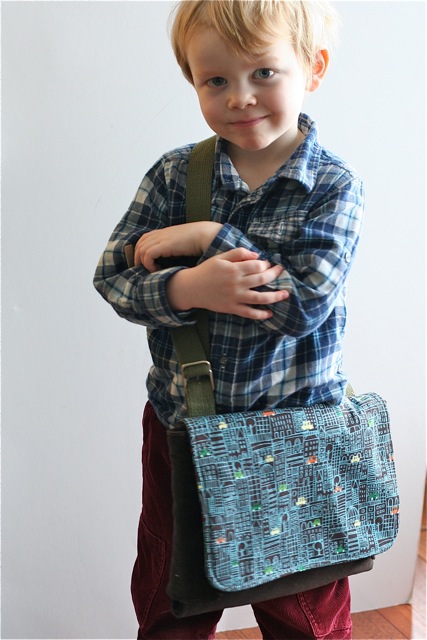
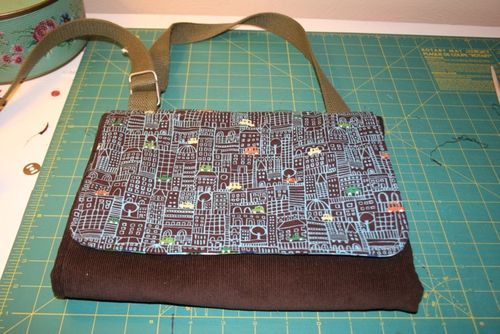
The messenger bag opens into a play mat! Fun stuff y'all. Are you ready to make one of these? It's not too hard and it's fun to use your imagination to make up the play mat. I have lots of pictures here to show you how to do it.
Begin by designing your play mat. Check out this post for how I made one these to look like a farm to go with Cal's tractors.
Materials that I used were about a yard & 1/4 of dark brown corduroy, 2 yards of fusible interfacing, about 1/2 yard of other fabrics for the play mat sections, flap & outside pocket, 10 inches of sew on velcro, a roll of white embroidery thread, longish embroidery needle, 24" or 36" cotton webbing & 2 D rings (these need to match the width of your webbing), chopstick, coordinating thread, sewing machine, & all purpose thread.
I choose a dark brown soft corduroy as my base fabric to match this cute bundle of boy fabrics that I recently bought. I cut 2 pieces of corduroy measuring 24" x 18" – one piece for the play mat and one piece for the back side of the bag. I also cut a 24" x 18" piece of fusible interfacing & a 24" x 18" piece of cotton batting. Fuse the interfacing to the fabric that will be the play mat side.
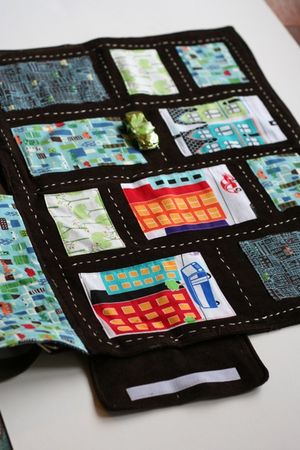
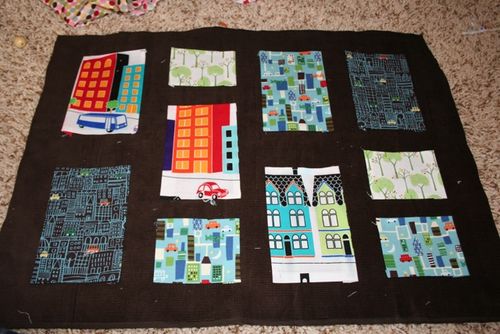
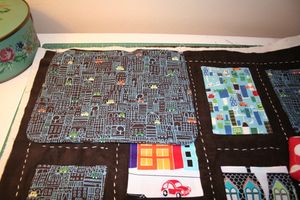
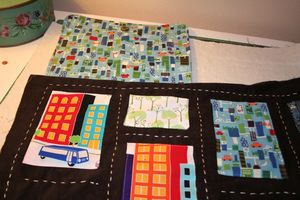
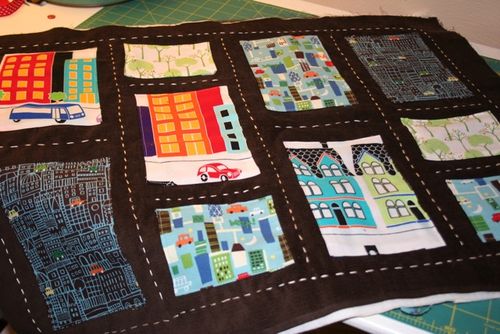
I wanted my city to be pretty symetrical. My large rectangles are 4.5" x 6.5" and the smaller rectangles are 4.5" x 3.25". I did six large and 4 small pieces. I ironed under all 4 sides of each piece 1/4". You should spend some time arranging the pieces the make it look just right and make sure that you keep all pieces 2" from the edge of your base fabric. I also did 1.5" between each piece to fit a toy car.
Now carefully pin your pieces in place and sew around each section an 1/8" from the edge.
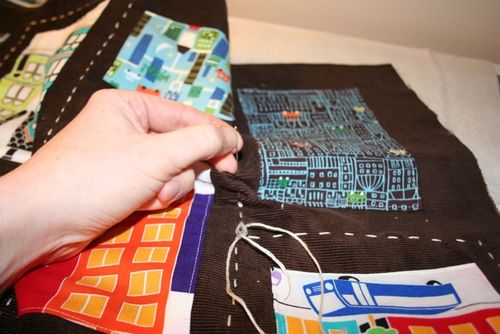
Next, using white embroidery thread and a longish embroidery needle, sew a simple straight stitch all around the perimeter, about a 1/2" from the edge of your "city sections".
In the picture above, I had to go back and make some tedious changes (according to my husband, road lines don't intersect!) so just look at that picture to see how you can make several stitches at one time with the needle and the embroidery thread. Instead, stitch around the outside perimeter first, then up the vertical long lines, then across the horizontal side "streets". Make sure the stitches end at the corner of a fabric section so it looks more like real street lines. There! You did it in half the time it took me since you didn't have to go back and correct those intersecting lines! Admire your super cute play mat.
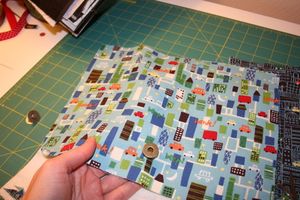
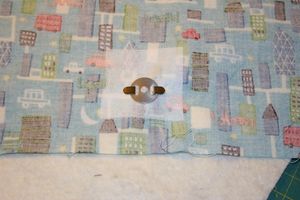
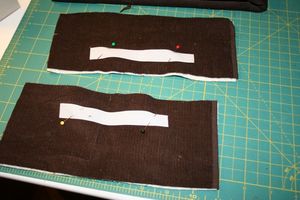
Now to make the flap at the front of your messenger bag. Measure 2 pieces of cotton fabric to be 9.25" x 11.5". Also cut a piece of cotton batting to be the same size. Cut a piece of fusible interfacing of the same size and fuse to which piece of fabric will be the outside. Round the corners of 2 bottom edges. see the picture below. Cut a 2" x 2" piece of fusible interfacing and fuse on the piece of fabric that will be the inside piece- it needs to be placed in the middle bottom about 1" up. See the picture below.
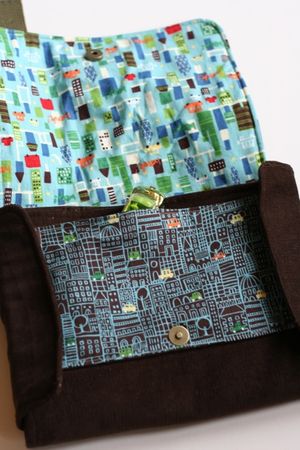
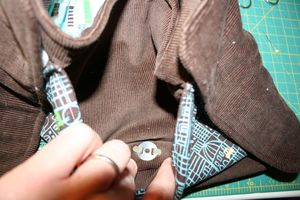
Have you ever used a magnetic snap? So easy! Use that square of interfacing and center the snap on the right side. Cut some tiny slits where the snap "arms" go in. On the wrong side of the fabric, use the other piece of the snap to finish it. See pictures below.
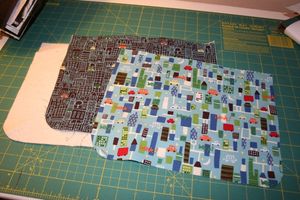
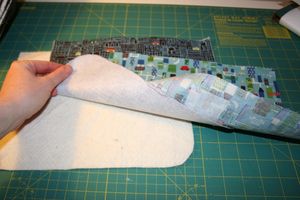
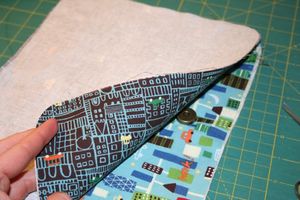
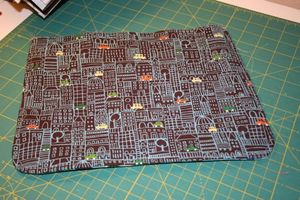
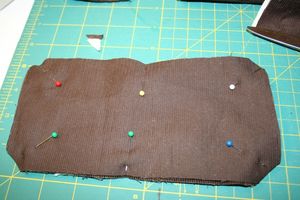
Now place the 2 fabric pieces together, right sides facing. leaving the long squared edge (without the curves), open, sew the 2 pieces together with a 1/4 seam, with the cotton batting on top of the interfaced piece. See the picture below. Once you have sewed around these 3 sides, trim excess seam allowance and turn the flap right sides out. Iron it well and sew a finishing seam around the 3 sides with a 1/8" seam. See picture below on right.
Place the flap on the top left corner of the play mat, with the side that has the magnetic snap face down. Sew it on with a 1/4" seam allowance. When you lift up the flap, it should look like the picture below on right.
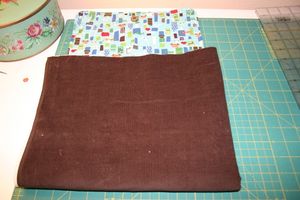
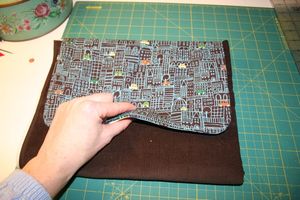
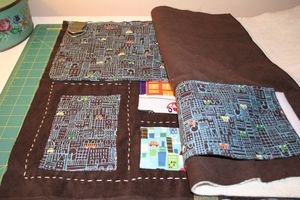
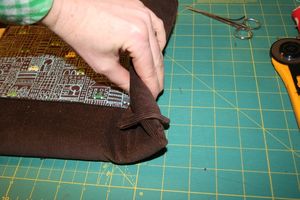
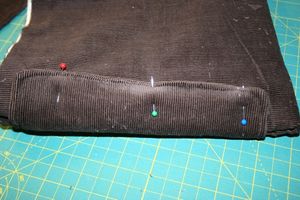
Where you place the outside pocket can be kinda confusing so here is a simple method so you know just where to place it. Take that other large piece of fabric that measures 18" x 24" ( for me it is the dark brown corduroy) & the piece of matching cotton batting, and place it behind your play mat with the flap attached. Fold it over like in the picture below.
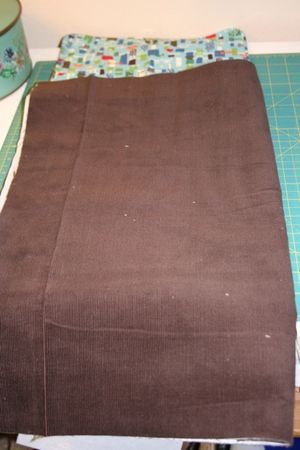
Then fold it up like in the picture below and put the flap down. This is to help you know which corner you will place your pocket. Set this aside for a minute and make that pocket.
I like to choose the same fabric as the top of the flap for my pocket. Cut 2 pieces of fabric 6" x 9". Also cut 1 piece of fusible interfacing the same size and fuse it to the piece that will be facing out on your pocket. Cut another piece of fusible interfacing that is 2" x 2" and fuse it to the lower middle of the back of the pocket fabric. This is where we will put the other side of the magnetic snap at the end of this project. With right sides facing, pin and sew all around the 4 sides with a 1/4" seam allowance. Leave yourself a 3 inch opening so that you can turn the pocket right side out. See the pictures below!
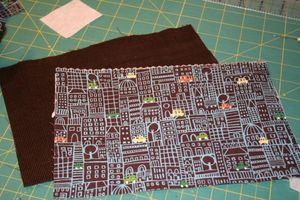
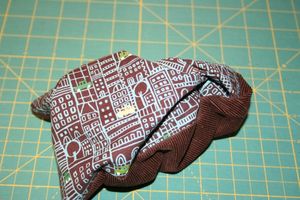
Poke the corners out with a chopstick and iron it nice and flat. Take it over to your sewing machine and sew across the top edge. Take the play mat all folded that just set aside and lightly pin the pocket in place under the flap. Place it 1.75" from the top edge and 2" from the left edge. See the picture below. Now, keeping the cotton batting, outside big fabric piece and pocket together, separate the play mat and set aside. Re adjust the pins to make the pocket on nice and stable. Sew it on about 1/8" from the edge down the 2 short sides and the bottom edge. Nice pocket!
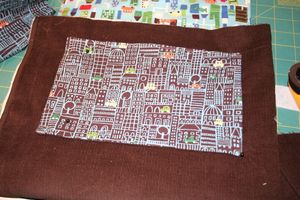
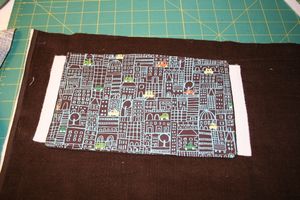
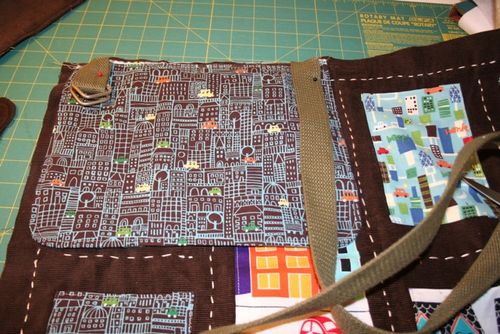
Cut two 5" sections of sew on velcro. Separate the pieces so you have 4 velcro strips. Sew 2 on either side of the pocket like in the picture above. Set this piece aside for the moment.
Now back to the play mat. You need to put the strap on your bag. You can either do one long strap that is 24" long or you can 2 D rings for an adjustable strap. That is what I did below. Cut your cotton webbing into 2 sections. One is only 5" and the other is 31". Thread the short piece of webbing through the D rings and then fold it over. Pin the webbing onto the play mat on the outside of the flap like in the picture below. I just used a belt from the thrift store that I took apart. So simple!
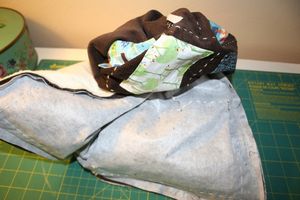
Now to sew the 2 sides together. Look at the picture below to see how to lay the 2 sides. If you are standing in front of the play mat, lay the outside layer on top, face down, with the outside pocket on the bottom left edge with the top of the pocket facing toward you. Pin carefully all around the piece. Tuck that strap inside if you did it like I did with the D rings. Spend some time making sure everything lines up well and smoothing it out evenly. Sew with a 1/2" seam allowance to make sure you get all the edges. Leave a 4-5" gap on the side that doesn't have the pocket, flap & strap. This will be where you turn the piece out. Turn it out and check all around to see if you missed any spots. Turn it back in and trim off your excess seam to 1/8". Turn it out again, poke the corner out with your chopstick, and iron well, paying special attention to the corners and the opening. Pin the opening closed.
Using coordinating thread, stitch all around the outer edge of your play mat with at about 1/4" from the edge. This will give your piece a finished look and will close up that opening you left to turn the piece out.
Fold it up and look what you have!!! Install the other 1/2 of the magnetic snap. It should fit nicely at the bottom of the pocket.
The side flaps are your last step. Cut 4 pieces of fabric and 2 pieces of cotton batting that measure 4.5" x 8.25". Since I used corduroy, I didn't use any interfacing here but you may need to if you choose a lightweight fabric. Layer a piece of fabric and a piece of cotton batting together. Center the other side of the sew on velcro (from the previous step) about .75 inches from the edge. See the picture on the left below. Now place another piece of fabric, right sides facing, on top. Pin & clip the corners off like in the picture on the right below.Sew all around, 1/4" to the edge, and leave a 2" gap to turn it right sides out. Turn out to make sure you caught all the edges. Turn back in and trim the excess seam down to 1/8". Turn out again and iron flat. Repeat with the other piece.
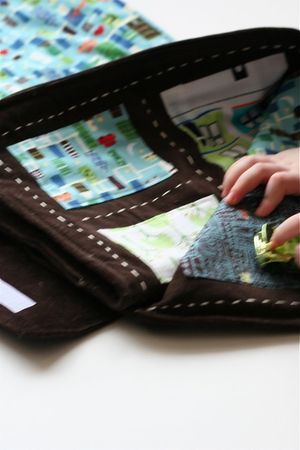
Open the flap of your bag. Lay one of the side pieces you just did face down and attached to it's opposite velcro. Fold it over (see picture below on left) and back over to the back side pin it in place.
Do the same with the other side. At this point, I hand sew these 2 sides on. This has been the best results for me since I can gage perfectly where the flap go on the back side and it all lays so nicely and it only takes a few minutes.
Now grab a few favorite matchbox cars and play with your boy! Then go back to your sewing machine and make another one! So far I have done this city mat and a farm, but I think I will try a race track, castle, even a fairy tale village with some sweet little clothespin dolls for the girls!
Please make as many of these as you want for personal use and gifts. This is an original pattern and I do not permit sales of my free tutorials. I would love to see a picture of your play mat! Upload to the gingercake tutorials flickr group here.

