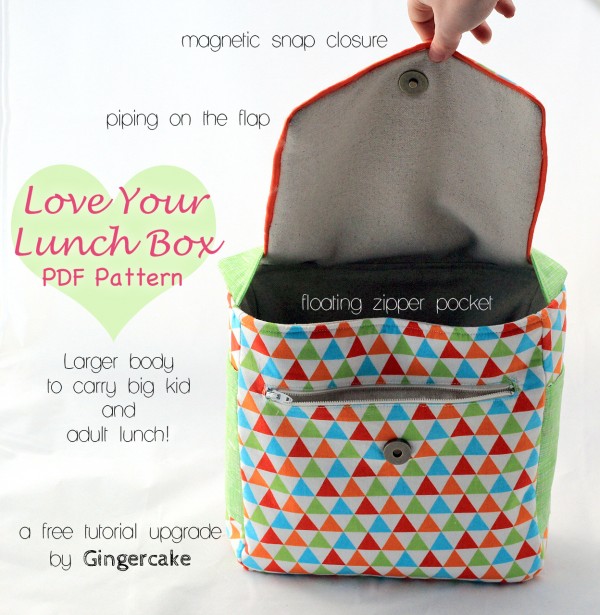
 When I first created the Love Your Lunch Box my oldest was just beginning Kindergarten (she is now going into 5th grade). It was just the right size for her lunch but now this classic and popular Gingercake pattern needs to grow up a little just like my little kid has become a big kid (forgive me a moment while I cry a little). Big kids eat bigger lunches!
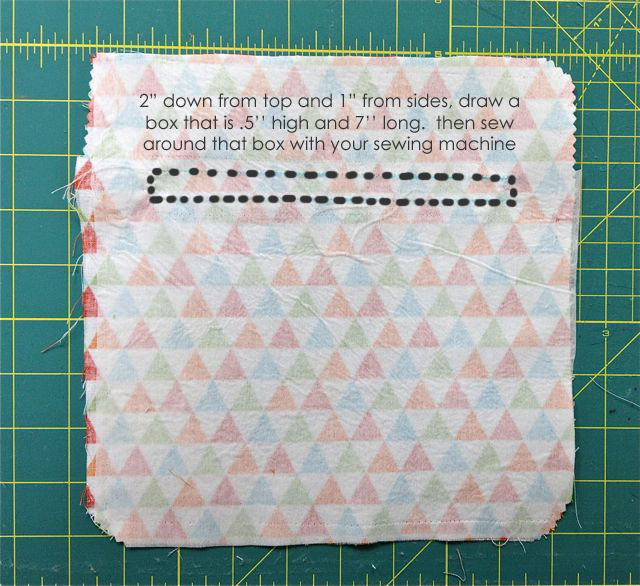
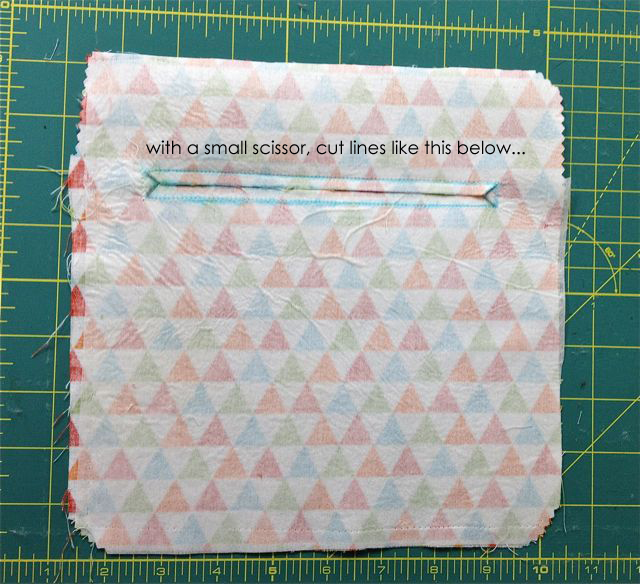
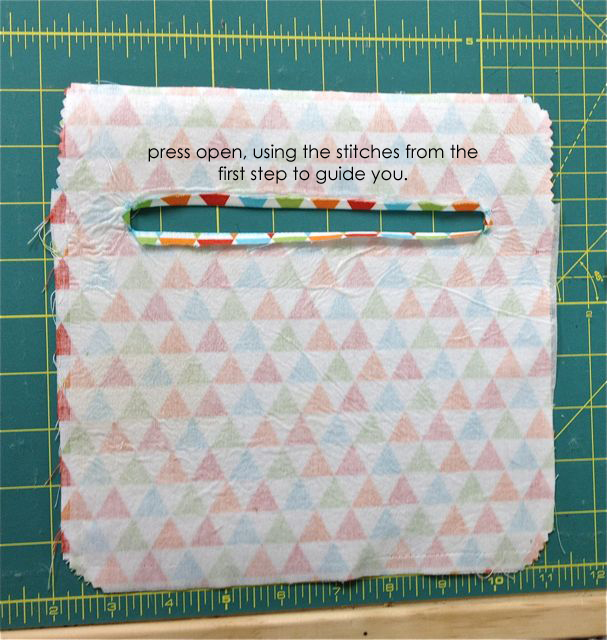
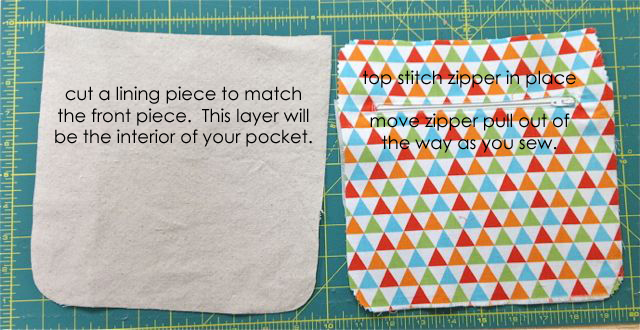
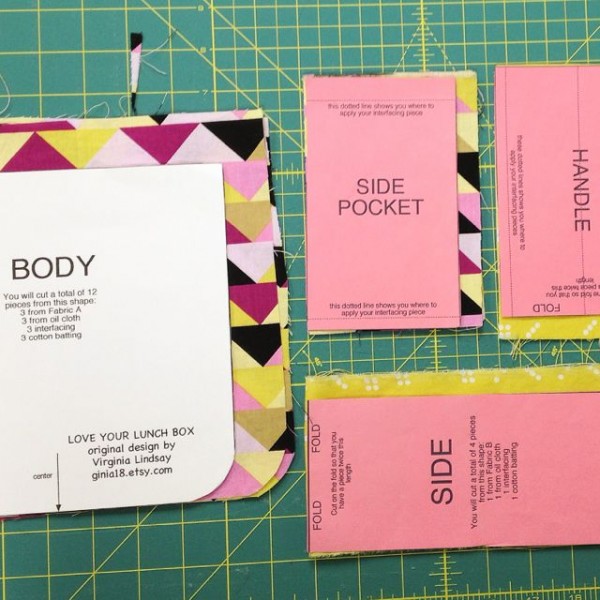 So here are the optional improvements~First, I’ll give you the new sizes. These measurements are for people who already own the Love Your Lunch Box Sewing Pattern. Use the original BODY pattern piece to guide cutting your rounded corners. The BODY pieces should be changed to 9” x 9”. The SIDE piece should be increased to 4” x 26” (you may want to add another inch or 2 to the length for comfort). The SIDE POCKET should be increased to 4” x 6”. And finally the HANDLE should be increased to 4.5” x 6.5”.Now you should have your pieces cut out and your interfacing fused to all the BODY pieces. You can make the floating zipper pocket if you would like! It is so easy and makes such a nice addition to your bag. Use the 9” x 9” body piece that you would like to be the front of your bag (not the flap! the front). Follow the following photo tutorial to install the pocket. please forgive my crude “stitches” in the first photo! I am trying to learn how to use some new software!

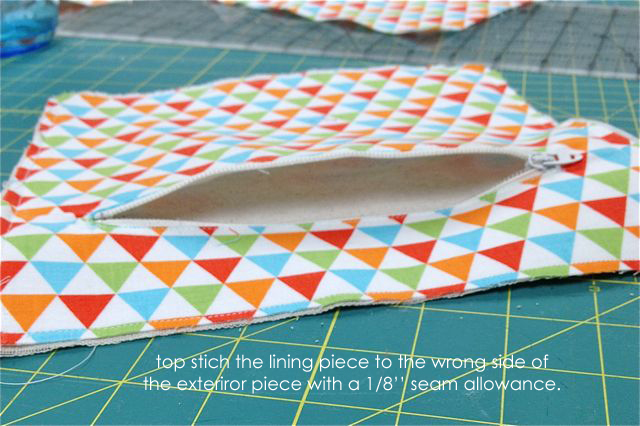 That’s it! You made the floating zipper pocket. You will install half of the magnetic snap inside the pocket later.
But first, here is another photo tutorial on how to make the piped flap. Very simple and easy but a nice upgrade for your bag.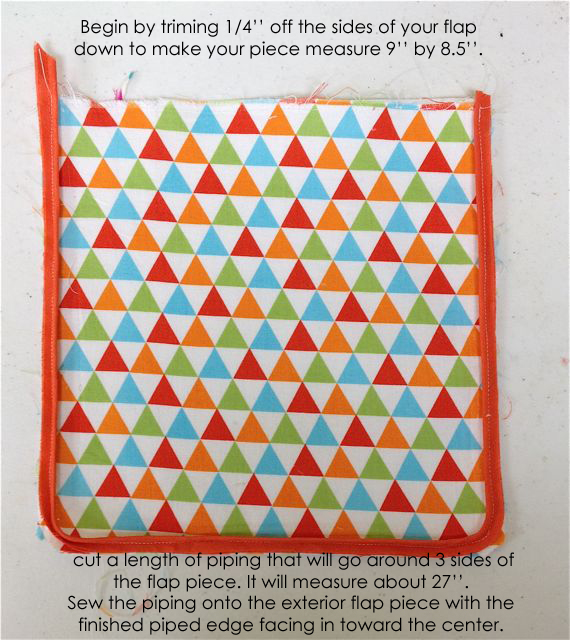
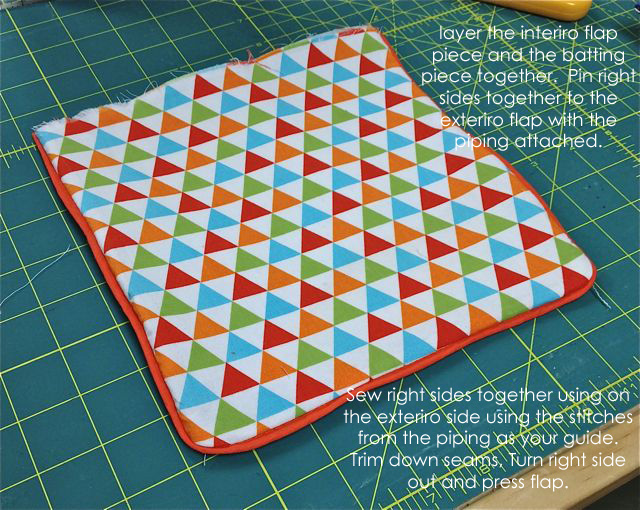 I love the look of the flap with piping! It is such a pretty frame.
I don’t have any photos of installing the magnetic snap instead of the velcro but here is a great tutorial on the basics. Before you attach the flap to the rest of the bag, simply install 1/2 of the snap, centered, about 1” above the bottom of the flap piece (you can see the snap on the flap in the second photo of this blog post). Then finish the bag according to the pattern instructions. After the bag is completely constructed, fold the flap down and mark where the snap naturally hits the front exterior panel. Open up that zipper pocket and install the other side of the snap. Easy!
There are lots of ways to customize this bag but I hope this gave you some fresh ideas for your Lunch box pattern. If you don’t already have the pattern, you can get the Love Your Lunch Box Pattern here.