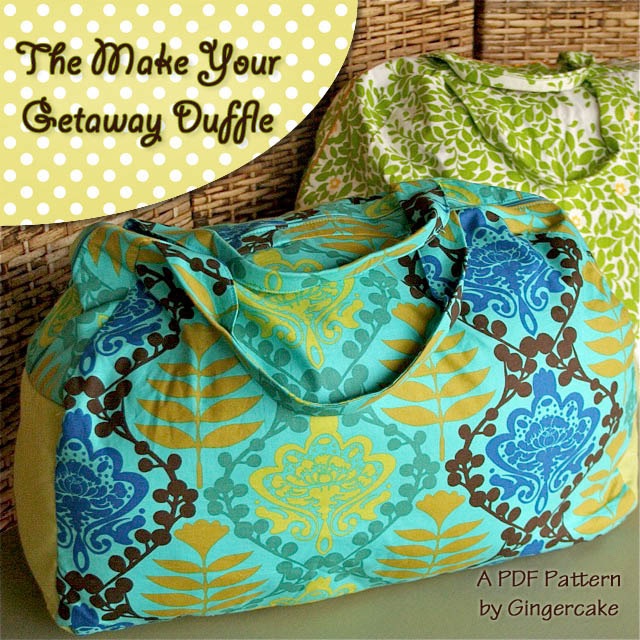
If you follow along regularly, you may remember the version of the Make your Getaway Duffle that I made for Elsie back in August. That version has become very popular and although the original version is a bit quicker, this one is not much more effort and might be fun for you to try if you want to change up the look of the classic Gingercake duffle pattern.
I did not include the shoulder strap (like on the bag that Elsie has) in this tutorial since it turns out it wasn’t very useful. I don’t want you adding something to your bag that doesn’t work well! I might try to revisit that shoulder strap in the future since the idea is right- it just needs more padding or width or something!
 I have only tried the straps and pocket like this on the adult size version. I imagine it would work fine on the child size if you experiment with the proportions a little. These instructions are meant to be a supplement to your purchase of the Make Your Getaway Duffle! They will not make sense unless you already own the pattern.
 The handles in the original pattern are 16” x 6”. To make these long handles, I simply used the WOF (width of fabric) since it is easiest and doesn’t waste fabric. So, cut 2 strips that are 6” x WOF. This usually is 42” to 44”. I wouldn’t go less than 40” length or you may have trouble putting the finished bag easily over your shoulder.
Press in half lengthwise, right sides together (light gray center press line). Unfold and then press the 2 long raw edges in toward that center fold, again wrong sides together. Open back up, mark the center, and fuse the 3” x 20” interfacing to the wrong side centered. See the drawing below.

Press the sides back in toward the center, and then press the center again. Top stitch down both long sides, 1/8” close to the edge. Follow instructions in the Make Your Getaway Duffle to complete the folded center of the handle. Repeat with the other 6” by WOF piece.
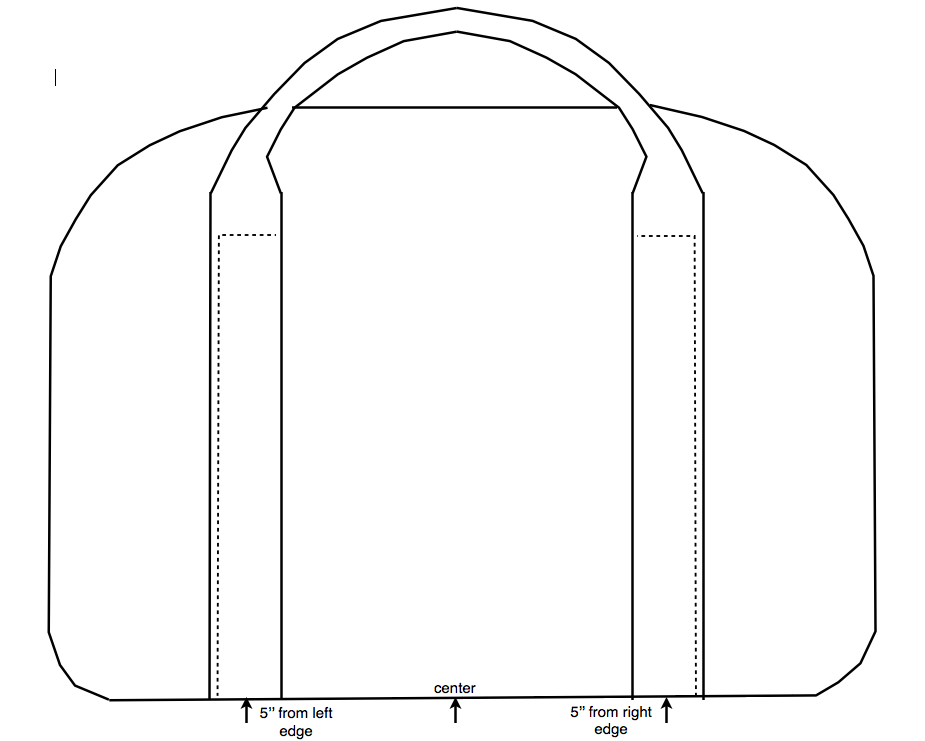
To attach the handle to the body piece, measure in from the left side 5” and mark with a pin or marking tool. Then measure 5” from the right side toward the center and again mark. Take one of the long handle and center it over the marks you just made. Make sure the handle is not twisted. See the drawing below for placement. Pin the outside of the handle in place on the body- use a long ruler or similar method to make sure that you keep the handle straight. Stop pinning where you can feel the thickness of the fusible interfacing and mark the pin perpendicular.
Top stitch the handle in place up the left side of the handle and then across where you marked the pin perpindicular to secure in place. Do not stitch down the other side yet. Repeat on the right side. Now your piece should look like the drawing below. Note how the stitches only come up one side of the handles.
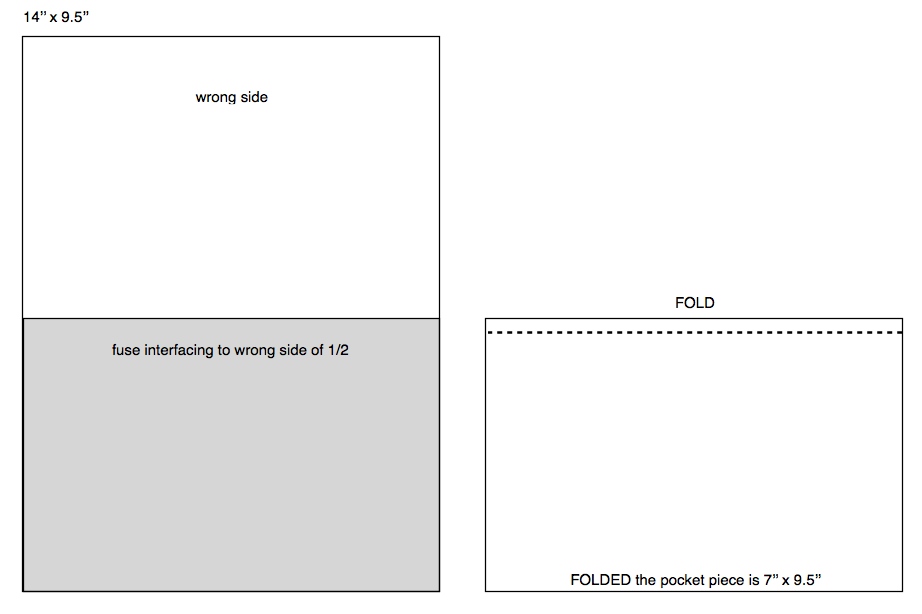
Make the pocket by cutting a piece of fabric that measures 14” x 9.5” (9” will fit between the handles if that is what you have but cut the extra width if possible to give yourself more space). Press in half, wrong side together. Folded, the piece should measure 7” x 9.5”. Unfold. Cut a piece of interfacing that measures 7” x 9.5” and fuse to 1/2 of the wrong side of your pocket piece. It should be a perfect fit!
I chose this size (9” x 14.5”) beacuse that was the size I could fit onto my 3/4 yard of fabric after I cut out the other pattern pieces.
Fold the wrong sides back together (interfacing is sandwiched between them) and top stitch 1/4” from the folded edge. See the drawing below for pocket construction.
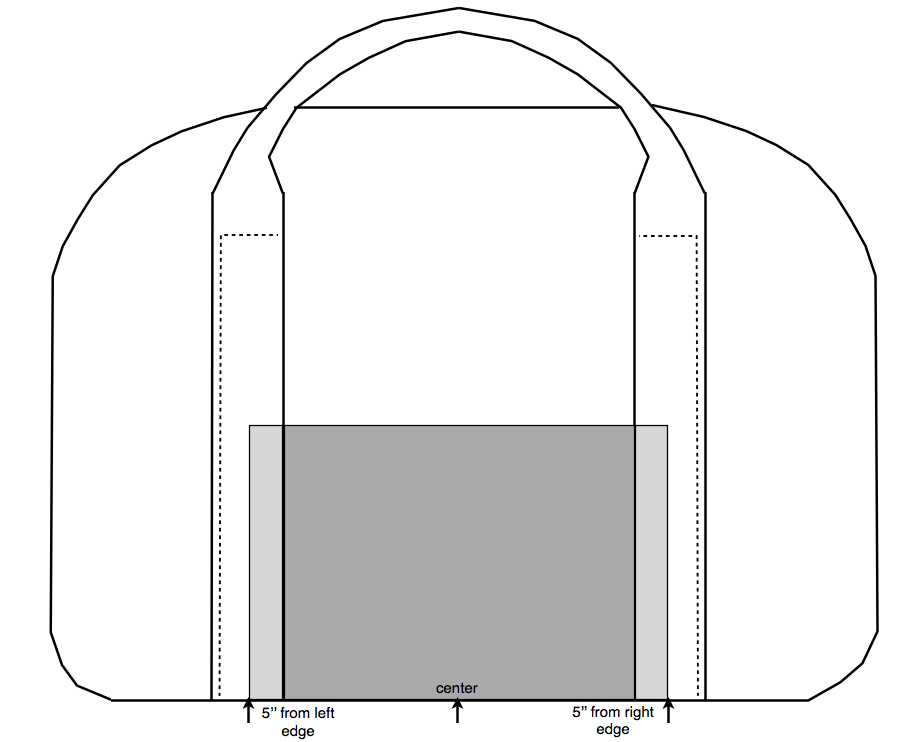
Position the pocket between the handles and lined up with the bottom of the body piece. See drawing below. The lighter shaded section of the pocket shows the pocket fabric beneath the handle. Pin and topstich the remaining sides of the handle down and at the same time securing the pocket into place.
Since I usually work with a 3/4 yard piece of fabric, I only have enough left over to make one pocket. But if you have additional fabric, you may choose to add a pocket to the other side too.
To make the long handles without the pocket between them, simply top stitch both sides of the handle down instead of leaving the sides open for the pocket.
Here are a few more duffles I made using the long handle and front pocket method. This first one was fun since I used 4 different fabrics (of the same collection – Affinity by Jessica Swift for Blend Fabrics). The bold mix turned out really well! This one was the first to sell at my show back in November!
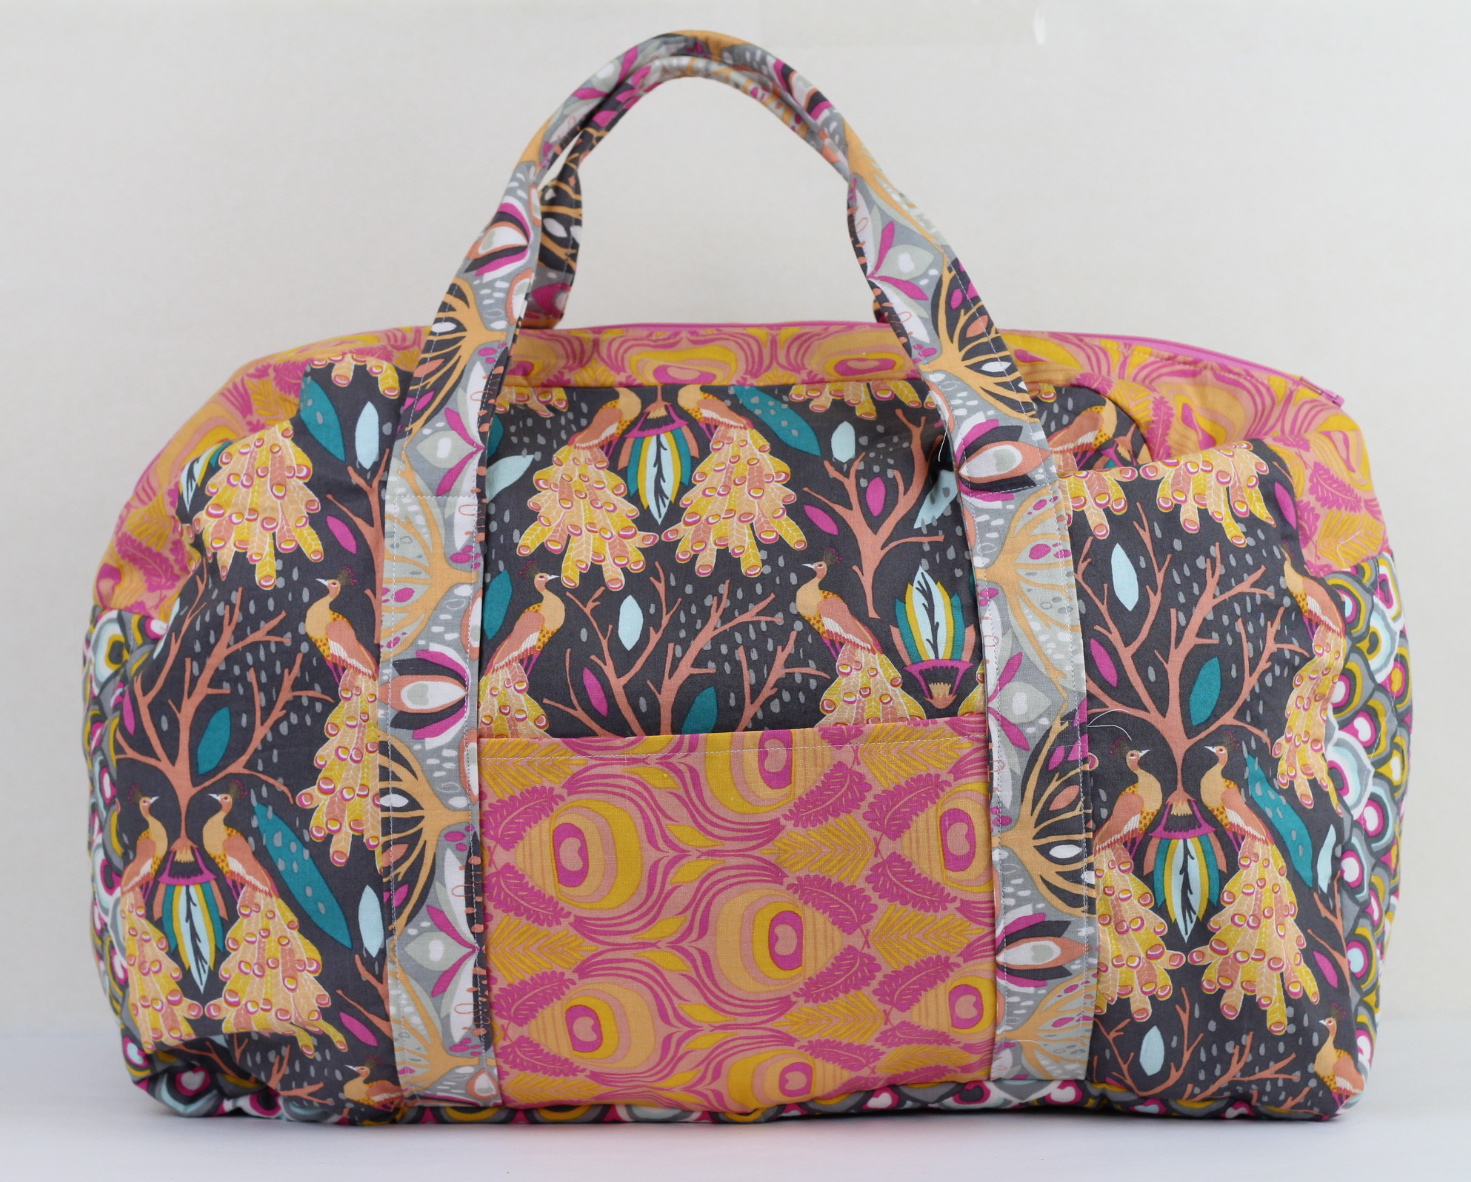 Next I used some Lotta Jansdotter fabric from Joann Fabrics for the one below. This one did not sell, but happily, Anne needed a new bag and she LOVES this one below…
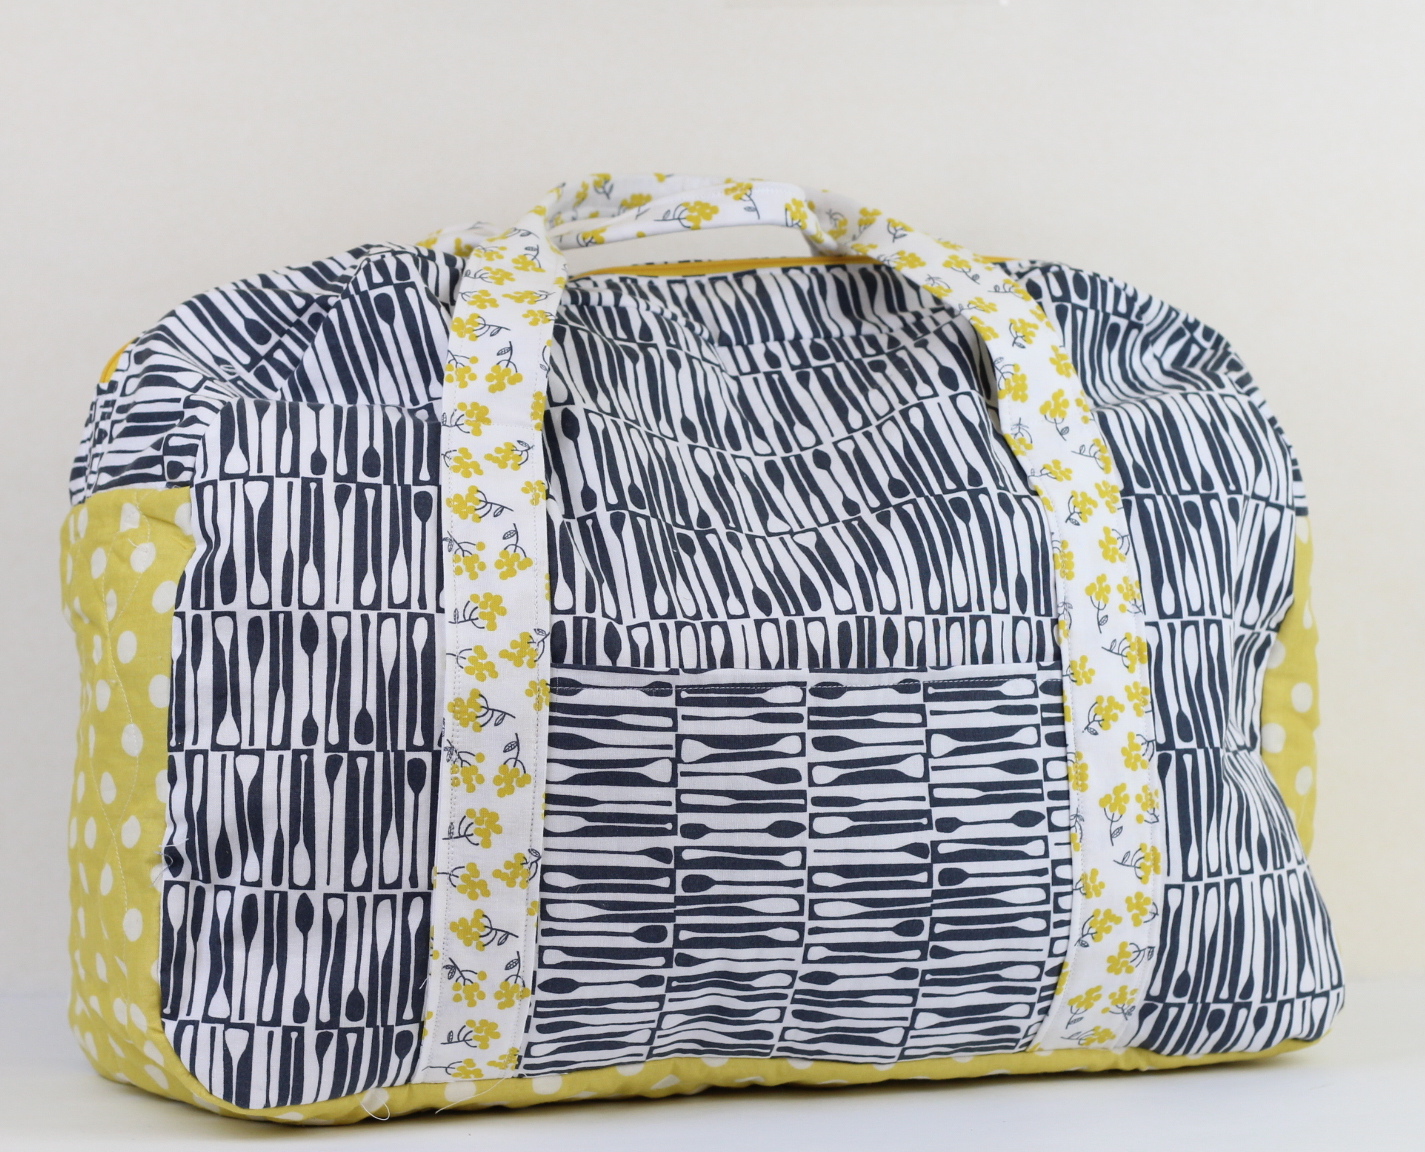 Please feel free to email me with questions. Also, please remember that this is a FREE tutorial and free instructions are not as detailed as actual patterns. This tutorial assumes that you own the Make Your Getaway Duffle already. You can purchas the pattern HERE.