My good friend Karen has had this chair for years. I have always loved its shape and that cool desk arm. She bought it at a charity auction some years ago. Karen has recently moved and I have been helping (myself to get out of the house and have new projects!) her to get her new home decorated. The new house is victorian with high ceilings and tons of gorgeous wood trim, floors, etc. So, Karen’s wood furniture pieces need some softening with…fabric!
This cushion turned out great but not without mistakes. Mistakes are worth sharing because helping people sew is all about getting through mistakes and still creating something functional and pretty :). So, let me walk you through this process and hopefully it will help you to conquer that cushion you have been hoping to sew! And hopefully give you permission to let yourself make mistakes too without giving up on a project. Ahem- I have experience with that too!
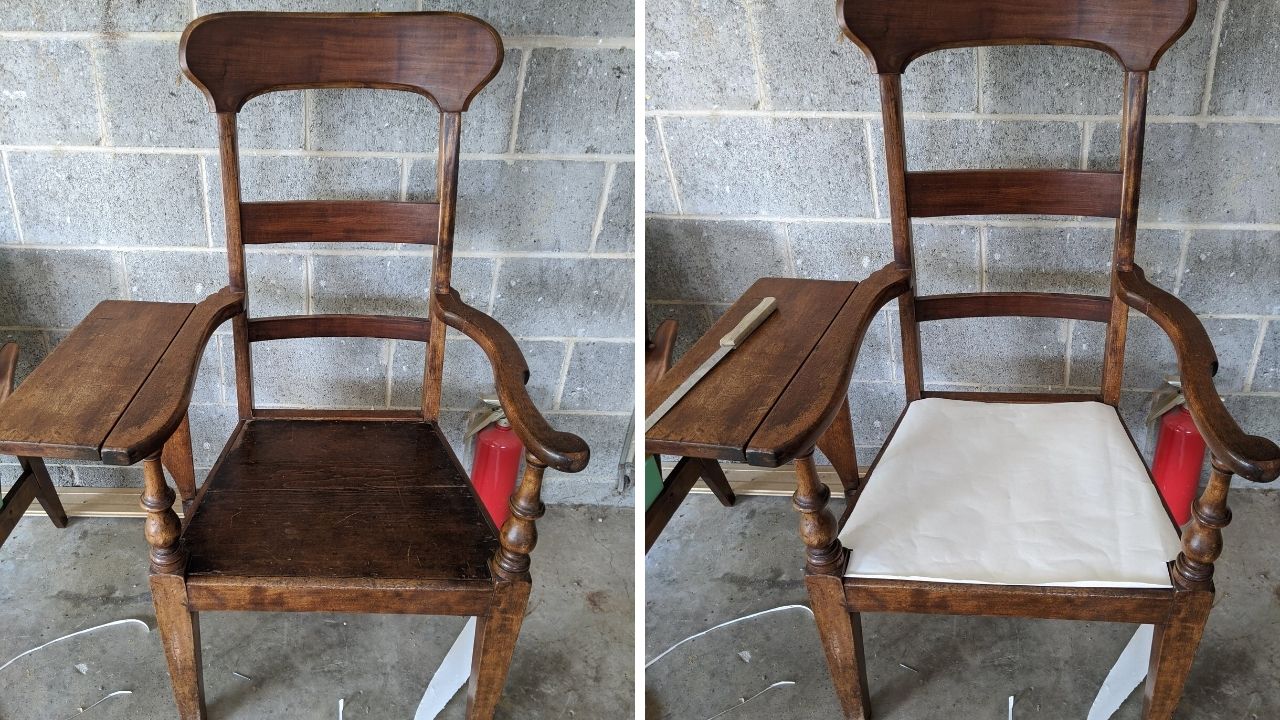
The first thing I had to do was create a template for the chair seat. I used a wide white paper but you could also use a piece of newspaper. I cut the paper about the right size and then creased edges to cut it exactly. I didn’t realize this chair seat had these little squares cut in to the front arm rests. This was my first challenge! Notice the bread knife on the right picture above. That was the tool I used to cut the foam in the next step. I watched this video below to guide me through that step.
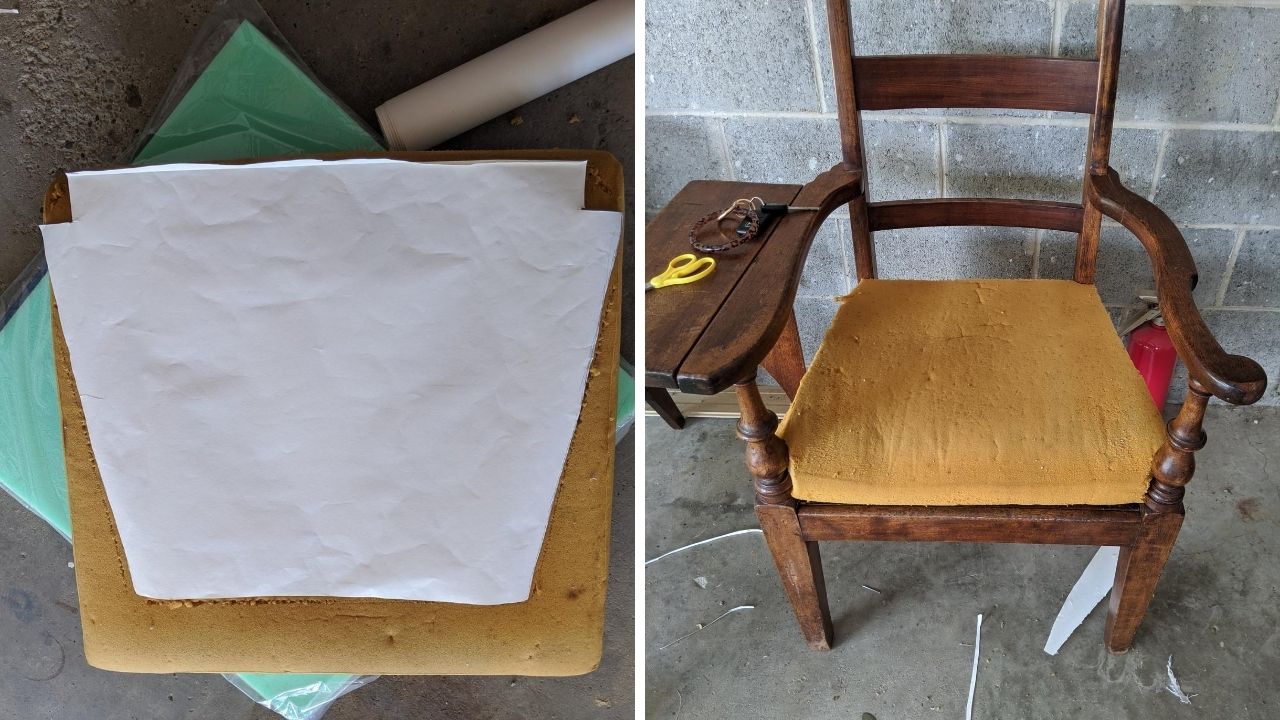
I realized that the funny cut out square corners could be solved by simply cutting those corners off at an angle. Foam is squishy after all! Also, even though we bought a green new foam piece, I decided to upcycle this old yellow one. It doesn’t look pretty but it was thicker and still in good shape. Especially for this side chair that isn’t going to get tons of action. Plus- upcycling! Next time, I think I will cut the cushion about 1/2” bigger than the template. This would have given me a little more room to make the fabric a tighter fit.
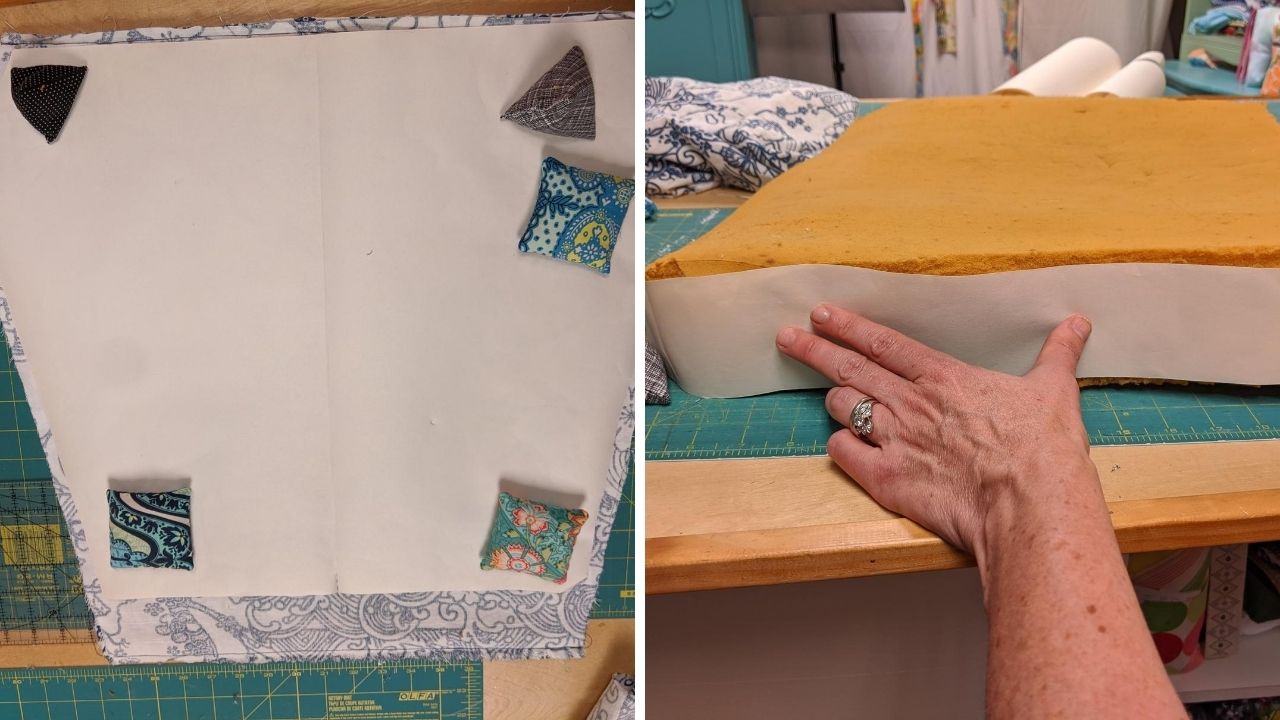
Next, I made another template! This time of the cut out foam. If my fabric did not have a directional print, I could have simply folded it in half and cut on the fold. That would have looked nice! I also created a template/ pattern piece for the sides. This piece of particular foam is curved a little- sorta slanted down toward the front edge. Another challenge! I fixed that by shaping the side template/ pattern piece to acommodate the shape. I then sewed the 2 large body pieces right sides together to create a loop.
Want to sew something fun and useful today?
I have a great pattern to take your skills to the next level!

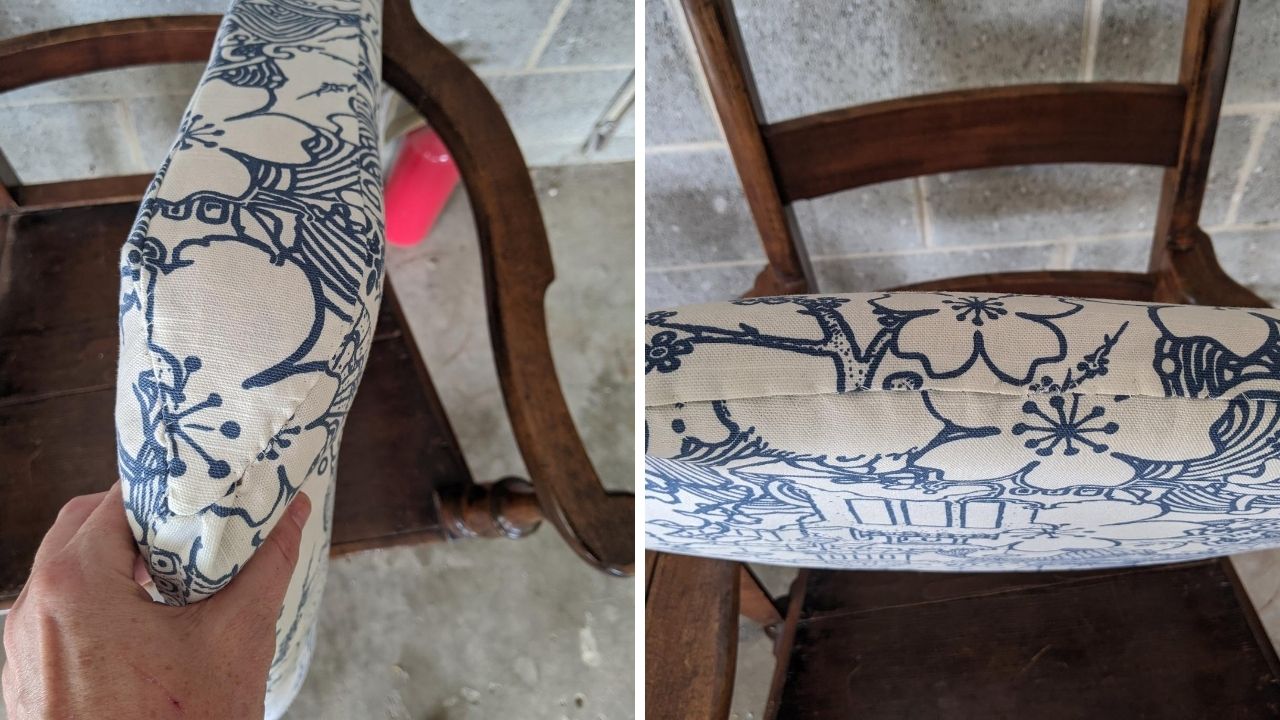
Since the front corners of the cushion had to be cut on an angle (becasue of those little square from the first photos), it created this funny inverted corner that stumped me a bit. My first solution was to add an ease stitch to the curve. I did an ease stitch on my Classic Bowling Bag pattern and it made the curved corner so easy! It is often used to attach sleeves in garment sewing. See the photos above. An ease stitch is simply sewing a strait stitch line on the longest stitch setting along your curve. Then you can pull the threads and very gently gather the fabric.
So I then attached the sides to the main body part of the cushion cover. The fit was OK but not quite as fitted as I would have liked. Mostly around that funny corner area where I did the ease stitch. I could have taken it all apart and started over, but instead I decided to do some strategic folding and pinning. Then, I hand sewing those folds in place with small ladder stitches and coordinating thread.
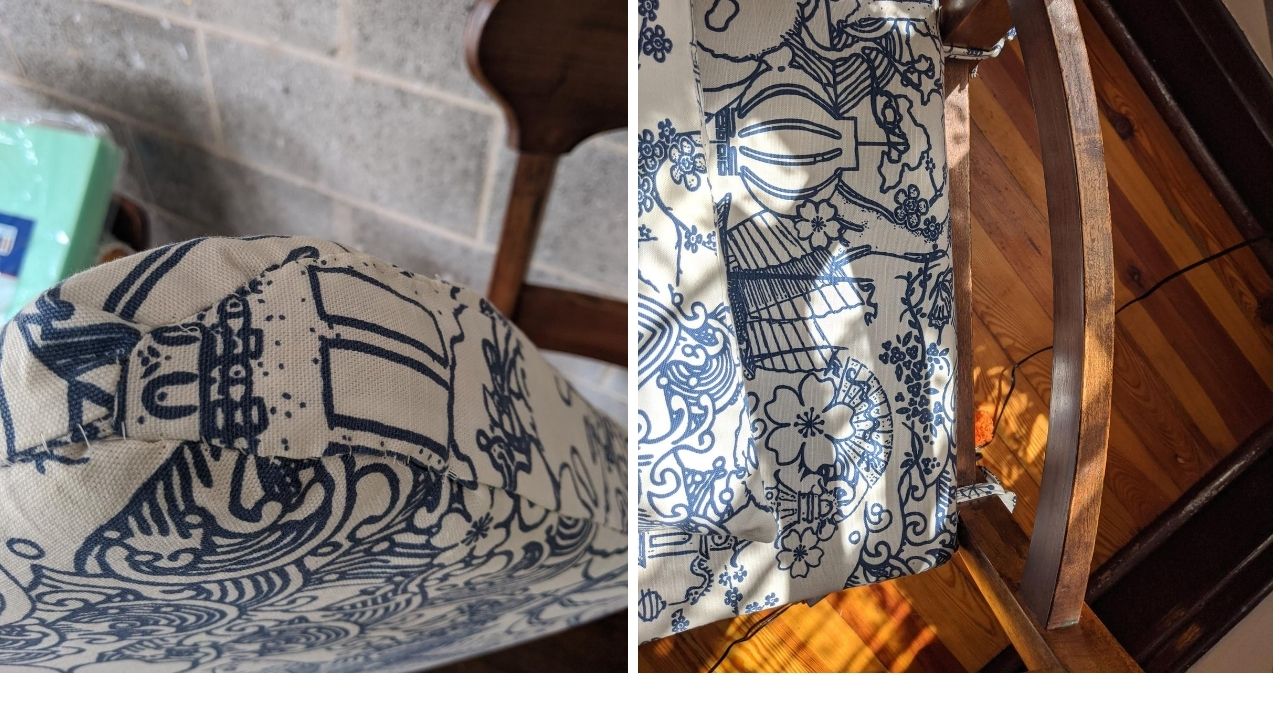
WELL, once you begin with the folding, pinning, and hand sewing, you keep finding little areas to tweek! I realize most of this could have all been avoided if I had made that foam just a bit bigger and not added seam allowance earlier. But I was fortunate that this fabric and thread blended very well. AND, this chair is going to be mostly decorative in my friend’s house. You can see from the photos above and below that I hand stitched quite a bit!
The corners were first, but then that made the cover more loose along the back edge and so, I tucked that and hand sewed again with a hem stitch. Goodness. If I had created a muslin all of this would have been avoided. Also, I probably could have watched a tutorial or something! But truthfully, it didn’t take that long and figuring stuff like this out is kind of my thing:).
After all that stitching, the cushion was a really nice fit! I placed it on the chair and realized it slipped all around. I created some ties that were about 10” and again hand sewed them to the back side of the cushion. Finally I made a 12” x 16” envelope style pillow with the extra fabric which she can use anywhere in the room to tie things together.
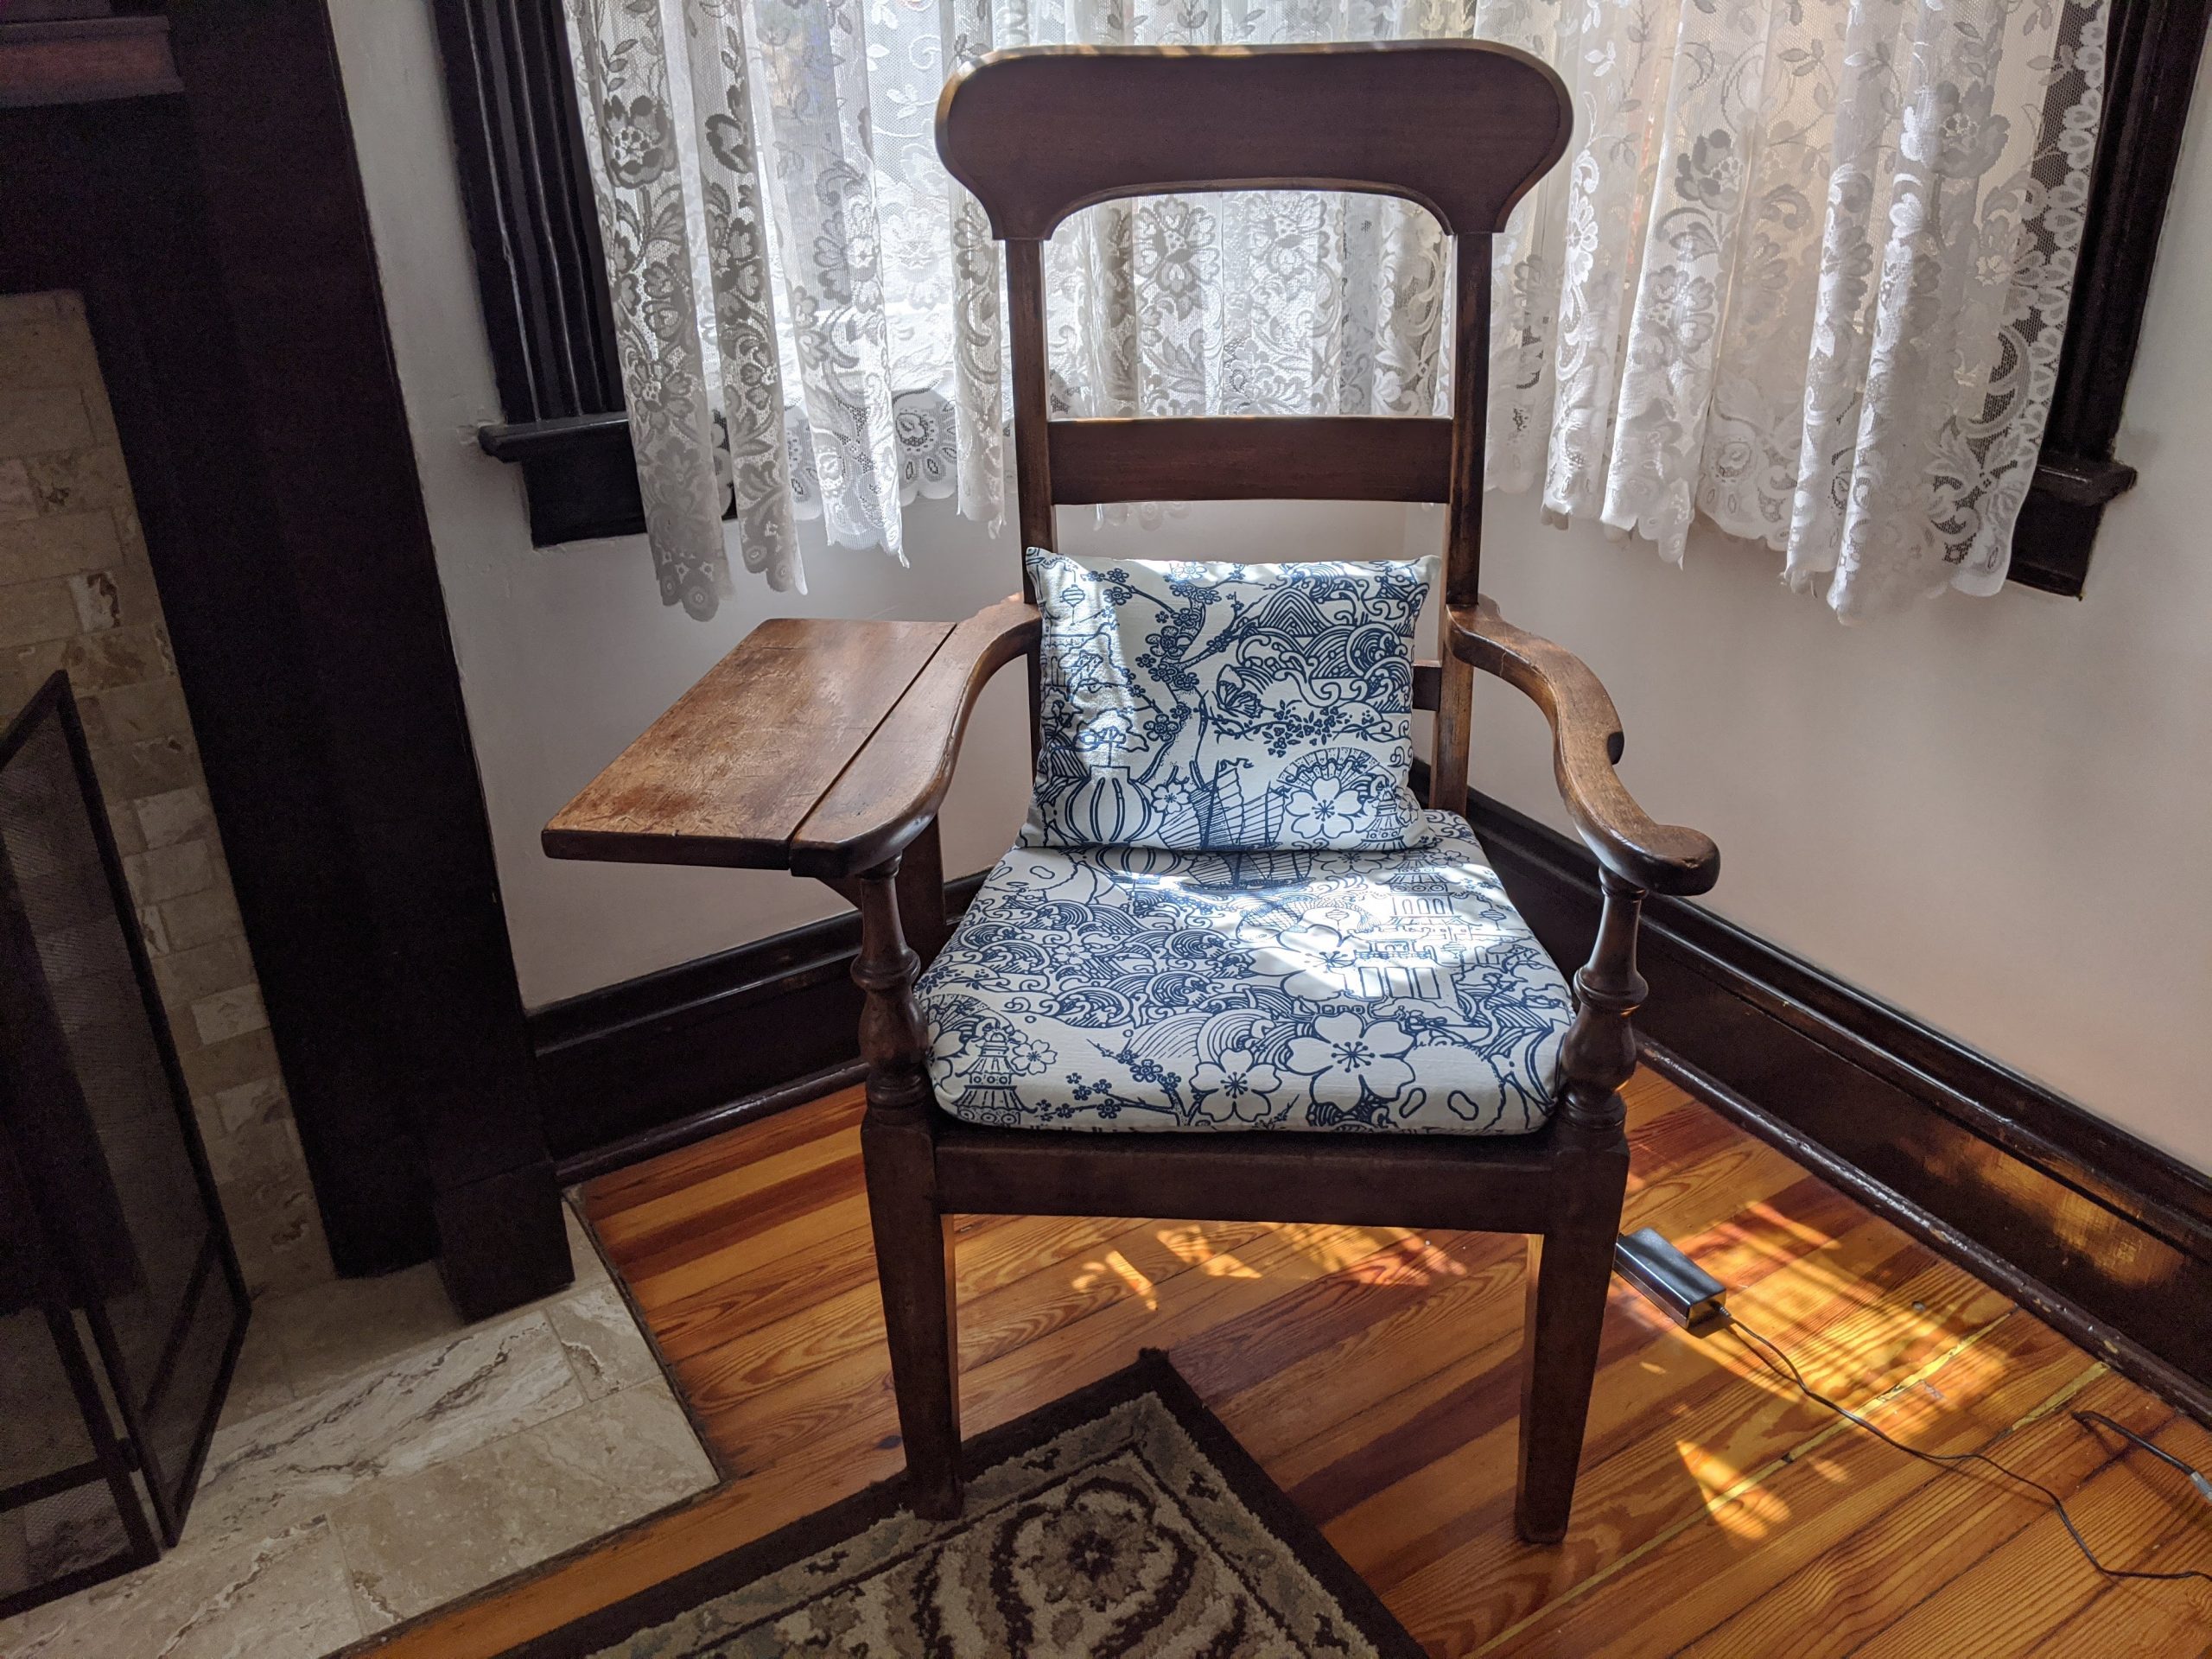
PHEW! I love how it looks and, more importantly, so does my pal Karen. I have been sewing for 10 years and you can see how many mistakes I made here. I go into projects like this not expecting perfection. I make as many smart choices as I can when I am trying something new but things still don’t work perfectly. Friends, I want to encourage you to try things and don’t worry so much about perfection!
So, what would you have done differently? How would you have solved that funny corner? Let me know your thoughts!
By the way, the fabric is from Joann Fabrics home decor section. It was about $20 a yard but we used a coupon! So, with the pillow form, this was about a $15 project.