I am no expert at photography but this part of blogging does interest me. I read (sorry! can't remember where!) recently about making an effort to stage a photo shoot. I'll give you the photos first and then the information on how I did this "photo shoot".


Again, I AM NO EXPERT! But I think I am getting better and here are some easy tips about what I do.

My kitchen is in the back of the house and is not bright enough to get natural light photos. I rolled my island (yes, it's on wheels) into my living room. I have that green back drop that I made awhile back and I often use it for photos. It is left over beaded board (from our real kitchen backsplash!) that I painted with left over paint and then did an easy glaze treatment. I propped it up with a chair from the living room. I also brought in some of my favorite kitchen accessories to make it look more like my real kitchen.
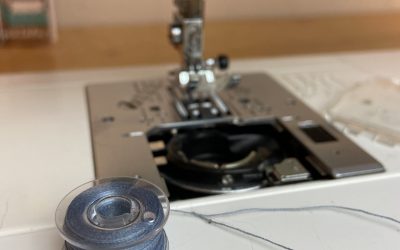
Then I took my photos. I have a Cannon Rebel XT. Nothing too fancy. I do have a 50mm lens that was a gift and now I use it to take all my blog pictures. This lens gives that beautiful background fade out that makes the subject of your photo really look vivid in the photo.
Next I use my IPhoto to brighten and sharpen my pictures. I have never done this on a PC but I am sure you can make simple adjustments there too! Here is a screen shot of the usual changes that I make.

I usually turn up the shadows first, then I play with the exposure a little, then I usually take the sharpness and turn it up almost all the way. This makes the details of your photo really stand out which is great for sewn items. Finally i adjust the temperature a little since I like my pictures to look a little golden. Below is this same picture but with no adjustments & then with adjustments…


See? Better, huh? You can see the colors better and the sharpness really brings out the texture of the fabric.
Next I crop my photos all the same size. I use the 2" x 3" size. This is so that they all have a balanced look when I upload them to my blog. Also, if I want to have pictures side by side, they will fit perfectly together if they are the same size. This is for Typepad but I would think it would work for Blogger and the others too.

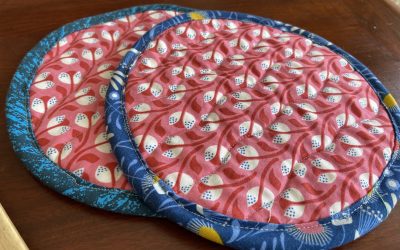
I choose to crop out the red canisters since they were kinda distracting. Also, I usually want to make sure that I don't cut off any part of my piece. Clipping a corner (in my opinion!) can make your whole picture look lopsided and lazy. If you can't get your whole piece in, make sure you have a focal point and it can be cropped to look good.

See? That one has the edges cropped but the focus is on the left edges of the pot holders so it works.
Well, I hope this gave you some good tips. I would love to hear your tips or share a blog post you have read that will help me to be a better photographer!
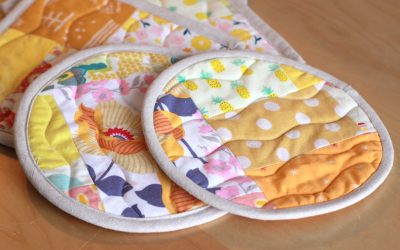
Coming soon will be a quick tutorial for these fun pot holders. It may have to wait until after the Handmade arcade but I have all the pictures done so it shouldn't be too big a deal to let you all know about it! I did these the same way as my quilts with the binding being the back piece and wrapping it around. Fun and easy to make those nice mitered corners!