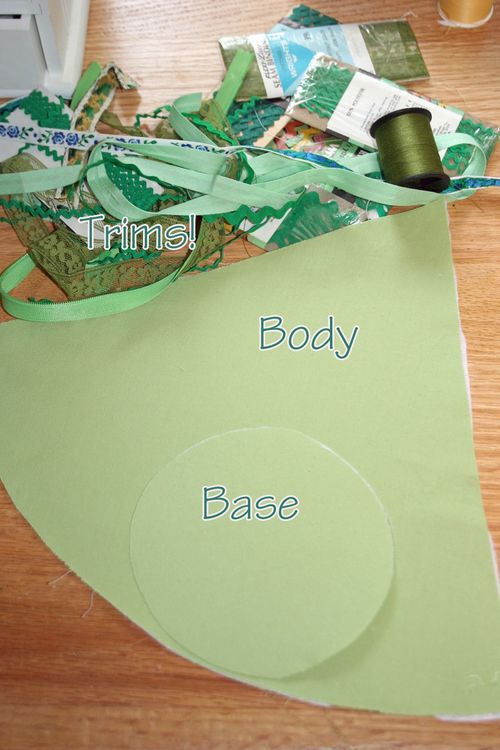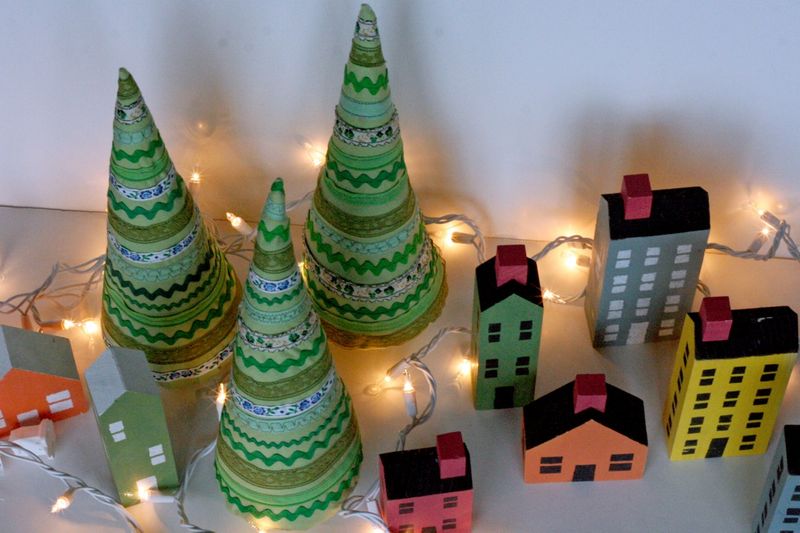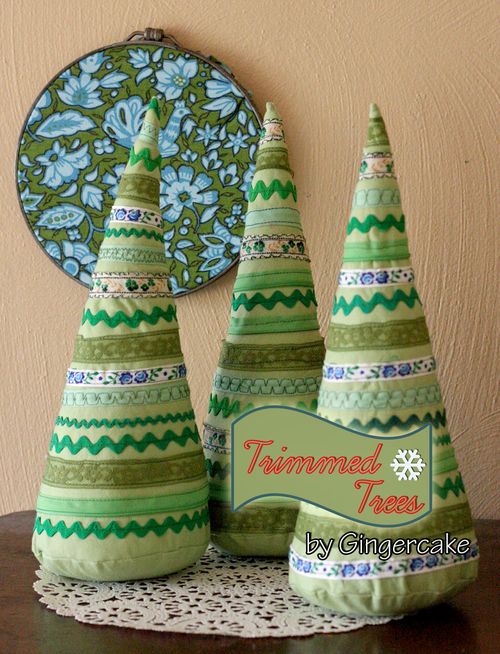
I have a bin full of trims that have been gathered for various projects and from the thrift store. All those bits and pieces have been piling up for years! I was organizing them by color and noticed how nice the textures all look together. These trimmed trees are the result! They are a cute addition to your mantle or a table top. I chose to use a light green Kona Cotton for these 3 but I am dying to find a moment to make a smaller pink and turquoise to finish up the look!
Want to make this simple project too? Begin by printing out the pattern pieces
Download Trimmed trees pattern pieces.
Materials needed:
1 fat quater of solid cotton fabric in your color choice
Fusible interfacing to back your cotton fabric
Trims (rick rack, ribbon, bias tape, zippers, seam binding, etc.)
Coordinating thread or clear thread
hand sewing needle and thread
scissors
sewing machine
plastic grocery bags / or polyfil stuffing and rice
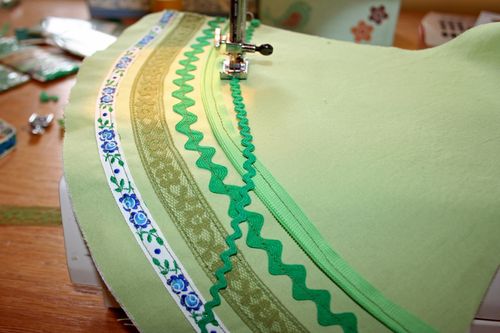
Begin by adding your first trim about 1" from the bottom. Ribbon, bias tape & seam binding (that cute lacy stuff) should be sewn on both the top and the bottom of the trim. Rick rack and zipper halves are fine with just 1 line of stitching. The bottom trim is important since it serves as a guide to adding the rest of the trims. Maybe draw a line with chalk or use pins to mark where it should begin and end.
I wanted my trees to have a more randomly decorated look so I tried not to use a specific order. You can see in the picture above that I am adding tiny rick rack. Allow yourself to use a good fabric glue if you are not up for testing your skills with a tiny rick rack! Make sure to backstitch and clip your threads at the end of each line.
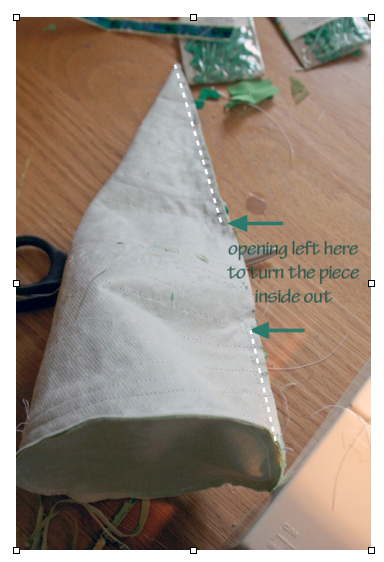
Once you have sewed on all your trims, fold your piece in half to make a cone shape. Start pining at the top and go down to the base. Sew the sides together with a 1/4" seam allowance. Leave a 3 inch opening to turn the tree inside out. See the picture below. Again, make sure you backstitch so that the side seams won't unravel when you turn it inside out!
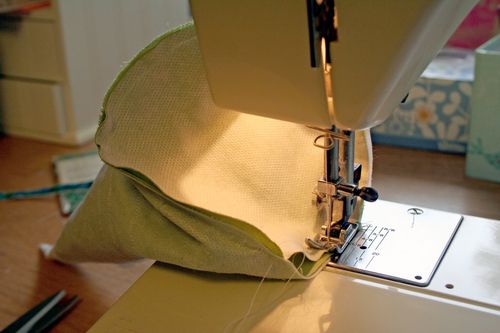
In the picture above, I alread sewed on the base and trimed the side seams. These steps are next! Take your base circle and pin it to your cone. Sew the 2 pieces toether with a 1/4" seam allowance.
Trim your seams down to 1/8" except at the side openning. Turn your tree inside out and use a chopstick to poke out the tip. I used plastic grocery bags to stuff my trees! I liked how they made it sturdier and it used up so many bags! If you choose to use polyfil stuffing instead, pour some rice/beans/popcorn in the bottom first to make sure your tree is bottom weighted enough to stand up.
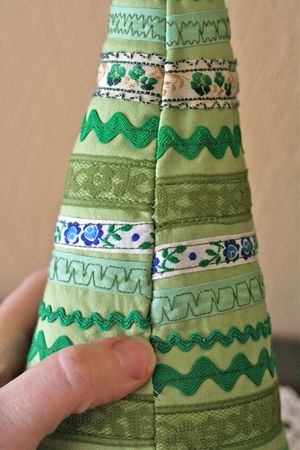
Above left is the tip of my tree and on the right is where I stitched up the opening of my tree with a blind stitch. You can see that the trims did not line up perfectly. You can make adjustments to get yours to be perfect if you would like.
My original thought was that these would go on our mantle but they also look cute in this little village setting too!
Such a fun project! And I used up some of that trim pile AND pesky grocery bags. If you make some of these cuties, I would love to see them in my gingercake tutorials flickr group. Trimmed trees is for personal use only- please do not sell trees made from this tutorial.
Happy decorating friends! Is your house all fixed up yet? Mine is still a huge mess but my cookie party is this weekend so i have to get busy!
