Color Strip Scraps Floor Pillows Tutorial

April 30, 2020

HI!  This is a tutorial I first published on Sew Mama Sew back in December 2015.  That website is no longer working so I wanted to make sure you could still make these adorable scrappy pillows…

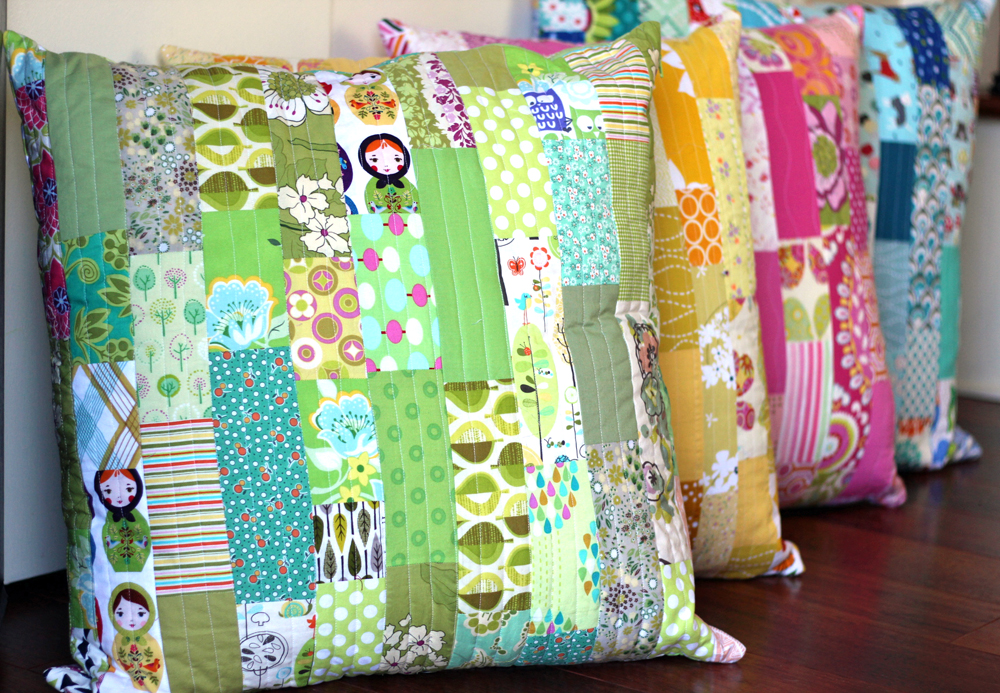
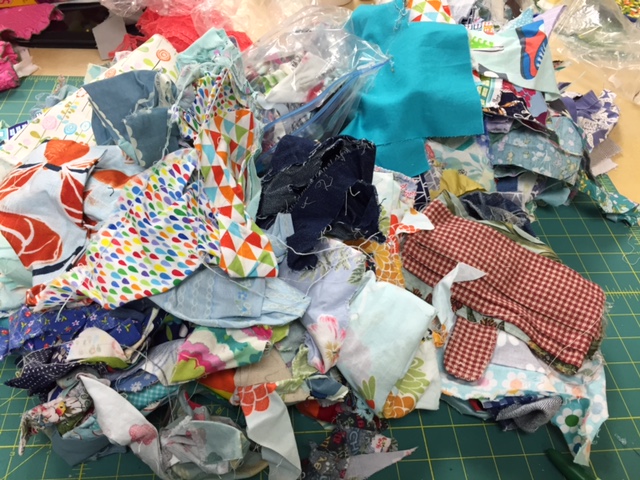
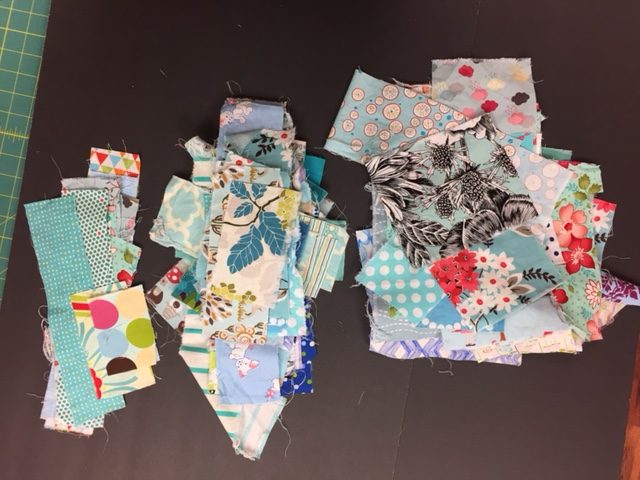
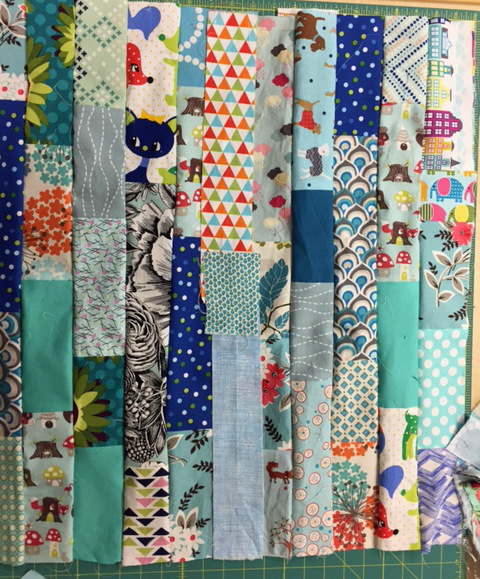
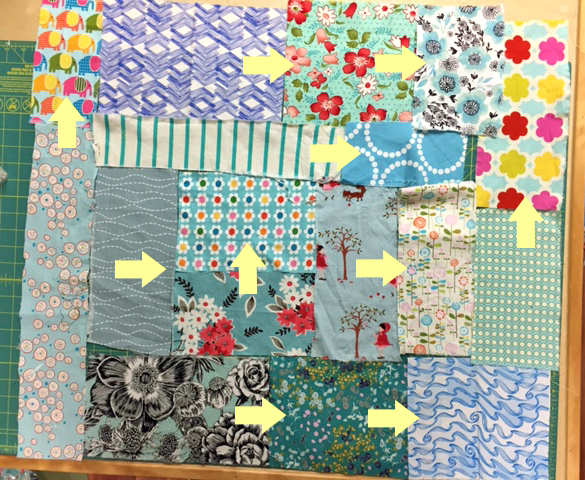
After you have been sewing for awhile, you realize that scrap busting is an important part of keeping your fabric stash healthy.  You can get a huge pile pretty quickly if you aren’t careful.  Already have that huge pile?  Don’t worry, I do too!   A few weeks ago, I knew it was time for a purge,  and this project was a great opportunity to make beautiful pillows, showcase some favorite scraps, and really make a big dent in that pile of little fabric pieces.

Large 24” to 27” pillow forms can be found at the fabric store but are also the standard size of pillows that come with your sofa and you may have some around your home that could use a new cover.  My favorite part of this project (besides busting so many scraps!) is that the pillow cover is made with a zipper side and it is fully lined.  This means it can be thrown in the washing machine no worries fraying and coming apart!   I imagine these pillows on the floor while the kids watch movies and being able to wash them easily is a big plus!
 
Let’s begin!
All seams allowances are 1/4” unless otherwise noted.
Materials needed:
scraps of one color- at least 2.5” width
cotton batting 30” x  60” (or smaller depending on the size of pillow form)
27” pillow form ( a 24”, 25”, 26” square will work too)
scissors, rotary cutter, self healing mat
Sewing machine and thread, standard foot and zipper foot
22” zipper (longer will also work)
2 large foam boards -optional but helpful
iron and ironing board
chopstick for poking out corners
If you do not already organize your scraps by color, take some time and separate out the scraps into basic colors.  Don’t spend too much time making your choices.  You can see in the photo below that my pile has a large variety of fabrics but all have blue as a base color (and somehow a red one got in there too!).  These are only woven cottons- no decor weight and no knits!

.

Once you have the scraps sorted by color, sort out the same color scraps into 3 piles:  
The largest pile will be fabrics that have a width of at least 3”
The second smaller pile will be of fabrics that have a 2.5” width.  Just keep your favorites!
The third pile will be the largest scraps in your collection.  These pieces will be significantly larger width than 3”- like 5” x 7”, etc.
Press all the fabrics so that you can do the next step neatly.  You can see my three piles below.   Use your rotary cutter and mat to straighten the the sides. You will not need this many fabric pieces but having an overage will help with your selection in the next step.
Using a board that you can pick up and move over to your sewing machine (I used 2 black foam boards that I bought at the dollar store), start auditioning your strips of 3” width fabrics onto the boards.  A few tips- spread out same fabric strips so they are evenly spaces.  Also, mix up darks and lights so they are evenly dispersed.  Don’t fuss too much with the placement of the pieces though!  This project looks best with quick decisions that come straight from your instincts.
You will make 10 lines of 3” strips that are about 30” long.  The width will become shorter when you sew the strips together and then also when you trim them down in the next step. 
Bring the boards over to your sewing machine.  Try to keep your layout in order as much possible.  Going line by line, sew the 3” ends of the strips right sides together.  Some of them will be longer than others but all should end up being at least 27” long.  Press the seams out as you go.  
Once you have all the strips sewn together, keep them in order but move them vertically so that the seams don’t match up.  This step is OPTIONAL but i think it looks a little nicer- like bricks!  THis is why most of the strips are longer that 27” so that you have this flexibility with the seams.  If a few seams are lined up- that’s ok too- it won’t make that big of a difference.
Trim off the ends so that the strips are all 27”.  See the photo below.

Want to make more like this?

I have a great pattern to take your skills to the next level!

Once you have all the 3” strips trimmed, you can sew the long vertical sides together with a 1/2” seam allowance.  Sew together 5 strips, set aside and the sew together the other five strips.  Since the pillow form is 27”, 10 strips all sewn together with a 1/4” seam allowance will only be 25”.  Now you can add the extra 2.5” width strip.  
The reason for doing the piecing this way is to give you flexibility.  My pillow forms for the 4 pillows that I made were between 24” and 27” square.  The whole idea of making the scrap strips pillow cover is to use up your scraps- We don’t need to be fusing too much with the pillow form size!  
If your pillow form is only 24”, leave out this additional strip and trim 1/2” off each end to make a 24” x 24” square.  
If your form is 25” x 25”- leave out the additional strip and trim ends to be a 25” square.  
If your pillow from is 26” x 26”- add the strip to the center, but then trim 1/2” off each end to make a 26” square
If your pillow from is 27” x 27”,  add the strip to the center and create a 27” square.  
To add the 2.5” width strip, stack the 2.5” strips   and sew them right sides together, just like you did a few steps ago with the 3” width strips.  Pay attention to how they will between the two 3” width sections you have already sewn together.  See the photo below for how I auditioned the center strip.  Trim the length to match the 3” sections, press out the seams and then sew the 2.5” strip right sides together with the existing 3” sections.  Press out all the seams and set aside for now.  The section should be a 27” square.
Next take the stack of larger scrap pieces and start arranging for the other side of the pillow.  Optionally, you can also just repeat the 3” width strips  but this is another method to get a scrappy looking pillow that you might have fun trying out.
Again, use your rotary cutter and mat to even out all the edges into rectangles.  Make sure you are cutting with the grain of the fabric.  In the photo below, I arranged my scraps into a very loose log cabin quilt block.  You can see how I attached the scrap pieces together by looking at the arrows in the photo below.  Some trimming will be required to get the scraps together but try to fit similar sizes together to create your block.  
The scraps all placed together before sewing any pieces together should be about 30” x 30”.  This will account for seams and give you plenty of flexibility for adjustment as you go along.
Sew the scrap pieces right sides together and press out your seams as you go.  Trim down extra fabric to get pieces to fit together.  Like with the strips side, pay attention to light and dark pieces and also, if possible,  avoid seams matching when you join sections together.  Your collection of larger scraps is going to look different from mine but the concepts of putting it together are the same.
As you sew the pieces right sides together, iron your seams out.  When you have sewn them all together, trim the piece down to 27” square.

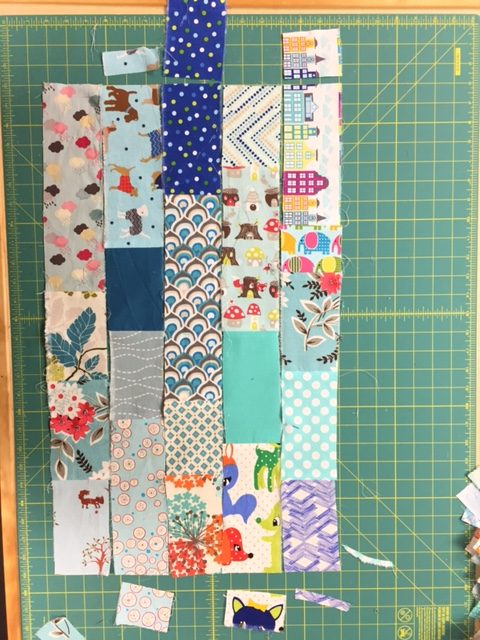
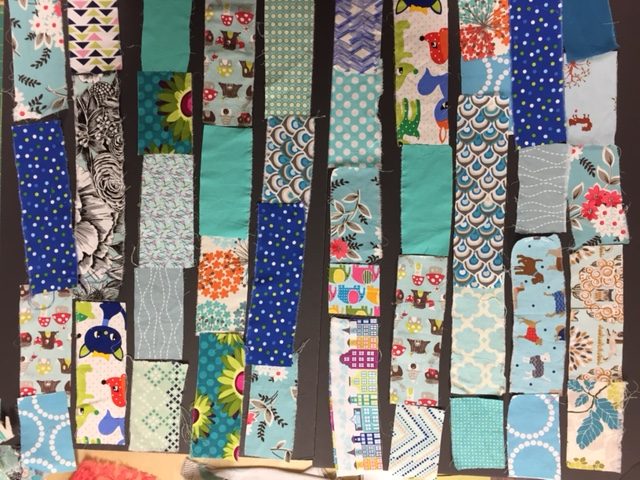
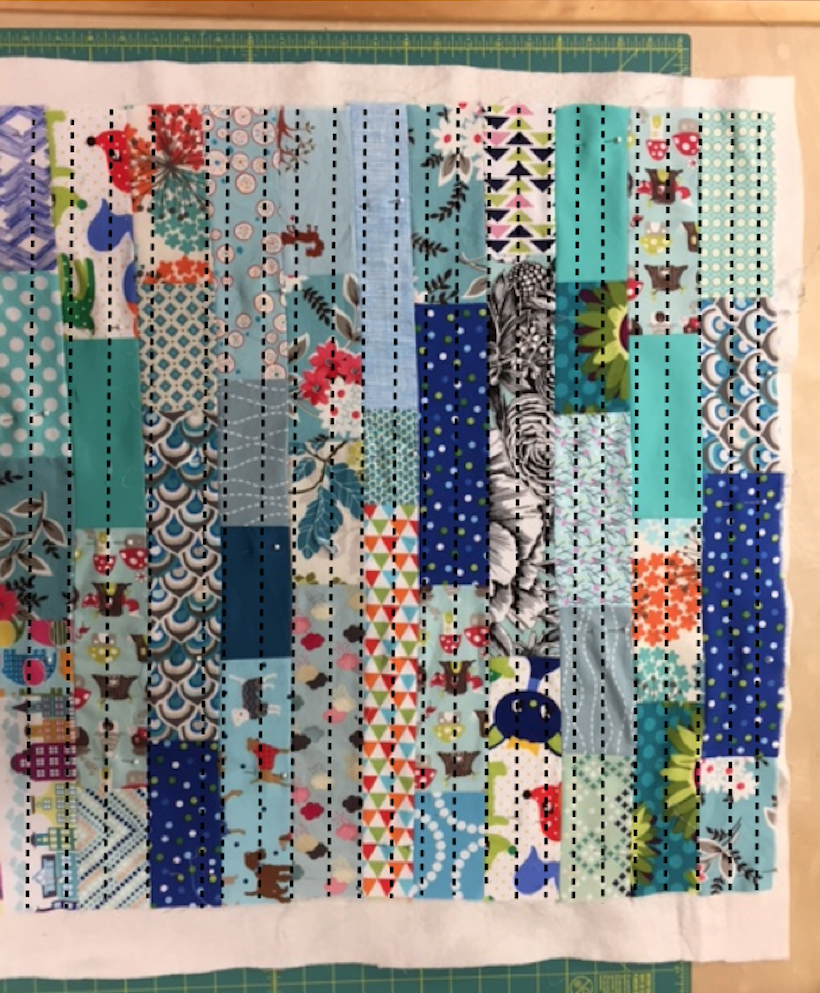
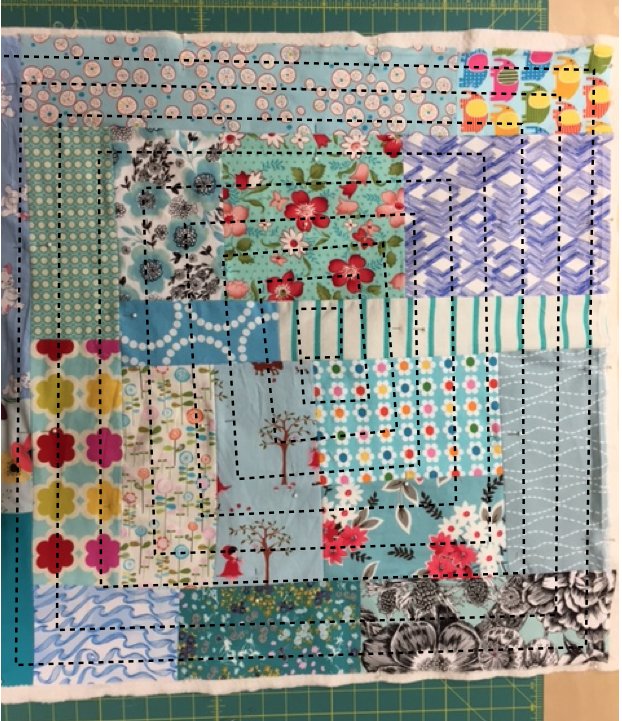
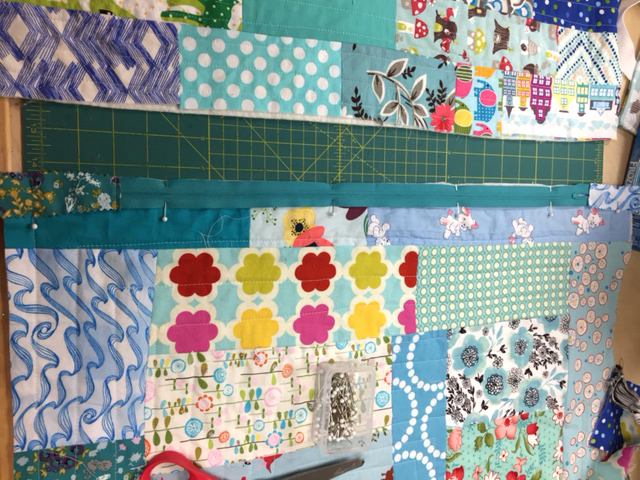
The next step is to quilt the pillow tops.  Cut the 30” x 60” piece in half to make two 30” square pieces.  This will give batting that is about 5.5” wider on all sides than the 27” pieces.  Put one of the batting pieces aside, and then center, pin and quilt the top piece with your preferred method onto the batting. You can see from the photo below that I choose to do vertical lines every 1” or so.

Repeat this process with the back piece.  You can see how I chose to sew around the perimeter and kept moving in all the way to the center.
Again, this can be any form of quilting- stitch in the ditch, loops, etc.  You are supposed to make this yours!
Next, trim down the batting to match the edge of the fabric.  This is a good time to check that the 2 sides are the same size and make necessary adjustments.
Now you need to add the fabric strips to the end of your 22” zipper.  Optionally, you can use a zipper that is the length of your piece if you have one handy- like a 24”, or 26”.  Invisible zippers would also look great on this pillow!
To add the fabric strip, cut a piece of blue fabric that is 1” x 8” Place the fabric right side facing the top side of the zipper with the end lined up with the metal stop.  See the photo on the left below.  Pin and sew the fabric and zipper together 3/8” above the stop.  Turn the piece over, fold the fabric down and press.  Then fold the fabric in half, wrong sides together, and press again.  THe fabric should now sandwich the zipper end.  Fold the raw end of the fabric over toward the wrong side and press.  Holding the fabric and zipper together, turn back over to the right side and pin in place.  Topstitch 1/8” down from the front side folded edge to secure the fabric in place on both sides of the zipper.  Repeat with the other end of the zipper.  See photos below.

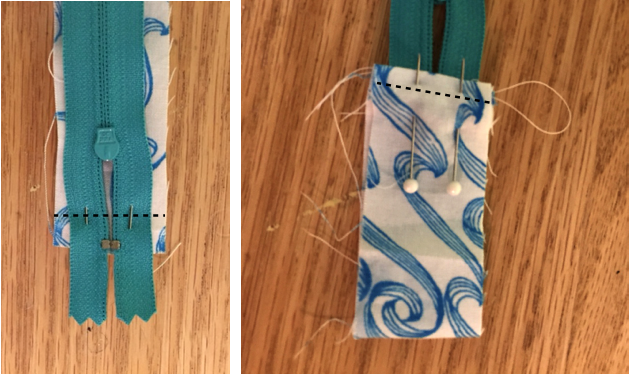
Pin the zipper to one edge of the pillow front (or back) right/ top sides together.  See photo below.  Using a zipper foot, sew the zipper in place.  Repeat with the other front side of the zipper and the other pillow side.

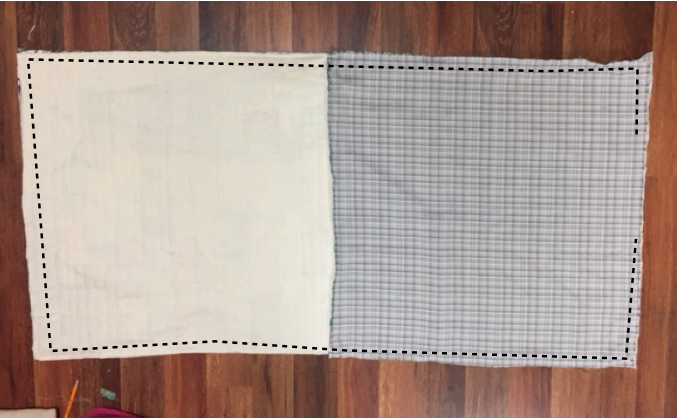
Next cut 2 pieces of lining fabric that are the size of your pillow form.  For the one I am making, it will be two 27” pieces.

Open the zipper 1/2 way before moving on the next step.  pull the sides apart so that the zipper is in the center and the lining pieces are right sides facing and the exterior pieces are right sides facing.  Pin the sides together so they match up evenly and sew like you see in the photo below.  Leave an 8” opening at the end of the lining side for turning.  Where the lining and exterior seams meet, sew the seams toward the exterior side.
Trim the corners and then pull the piece right side out through the opening in the lining and through the zipper opening.  Check all the seams and poke out the corners of the exterior with a chopstick.  Then, topstitch the opening closed by pressing under the raw edges and sewing 1/8” to the edge.

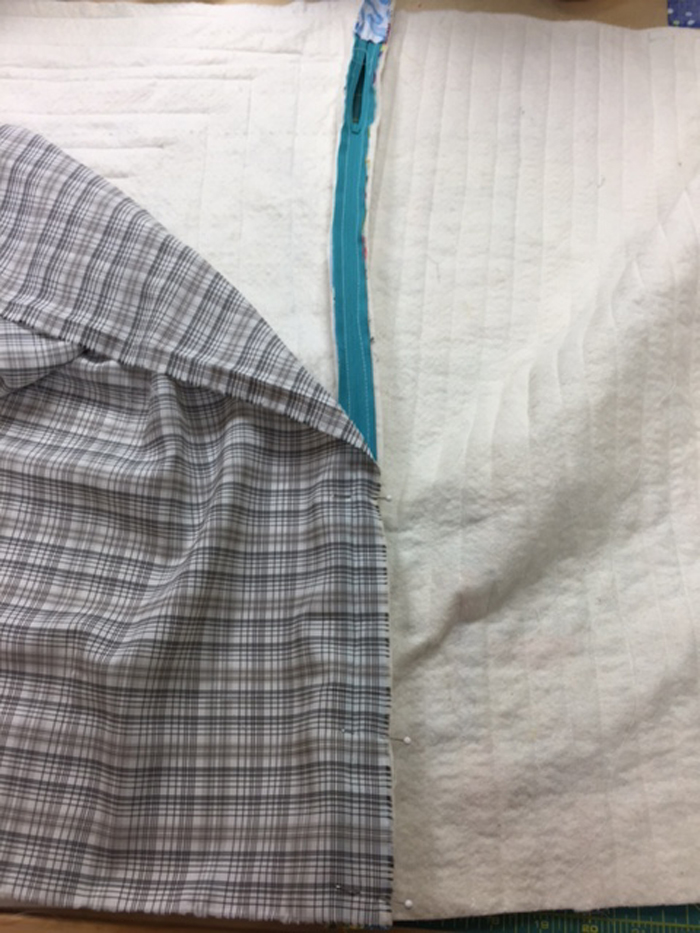
Push the lining inside the exterior, zip closed and press thoroughly.

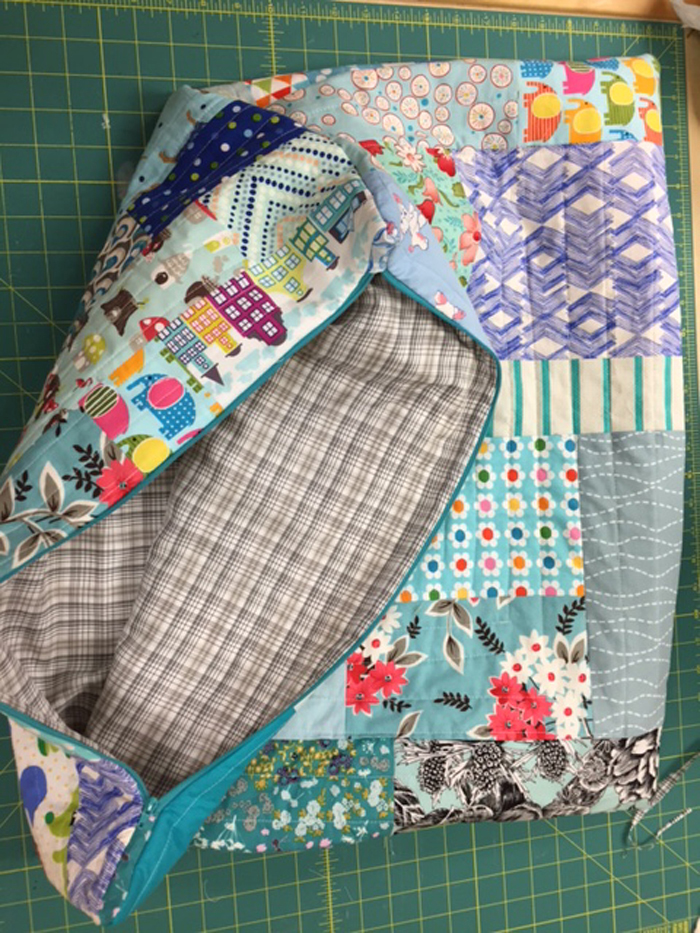
Insert your pillow form and admire your beautiful patchwork pillow!

Archives

Read More Articles

6 Steps to Sew a Beautiful Simple Circle Hot Pad

6 Steps to Sew a Beautiful Simple Circle Hot Pad

At some point in your sewing life, I'm sure you have tried to sew a hot pad/ pot holder.  Something that looks so simple can be a frustrating project!  Either you make it too thin and burn your hand or you try to make it too thick and it end up looking lumpy!  How can...

read more
My favorite FEET- sewing machine feet!

My favorite FEET- sewing machine feet!

FEET!  They can be confusing.  Which one do I use?  Why are there so many to choose from?  What in the world does this one do?  Sewing machines usually come with a set of feet for different uses.  There are many extra ones you can purchase for specialty sewing- from...

read more
Yellow Scrap Fabric Made into Hot pads!

Yellow Scrap Fabric Made into Hot pads!

 Awhile ago I created some yellow scrap fabric yardage and showed you all my method over on THIS youtube video.  At the time I wasn't sure what to do with that piece.  Maybe another pillow?  Make it larger to make a baby quilt?  I finally decided on a new set of hot...

read more