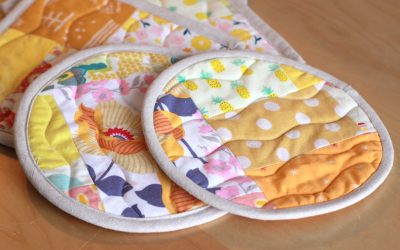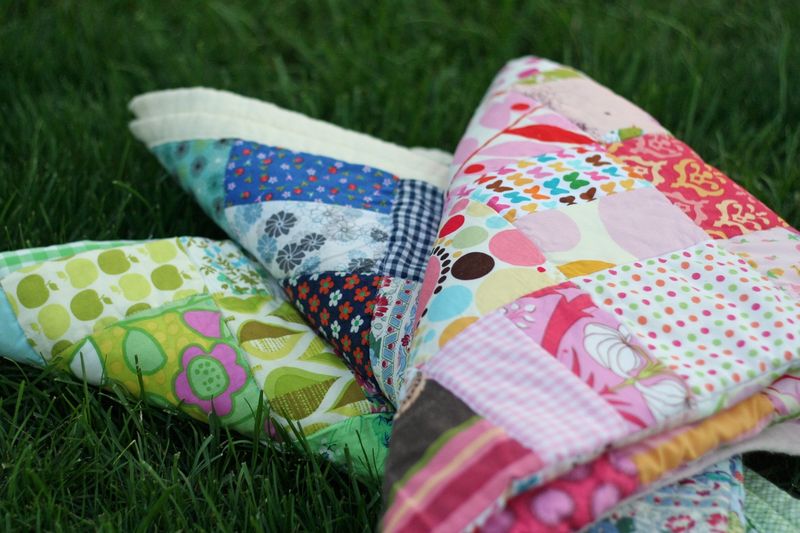
Hi again! As I mentioned earlier today, what I like about these quilts is the ease of coordinating the colors. In decorating, I love it when a whole room is all blue or green and even though the greens or blues may not be exactly the same, the design works since the basic color carries throughout the room. That is the thinking behind these little quilts too. And, you get to use up a lot of those pesky fabric scraps that are cluttering up your sewing room!
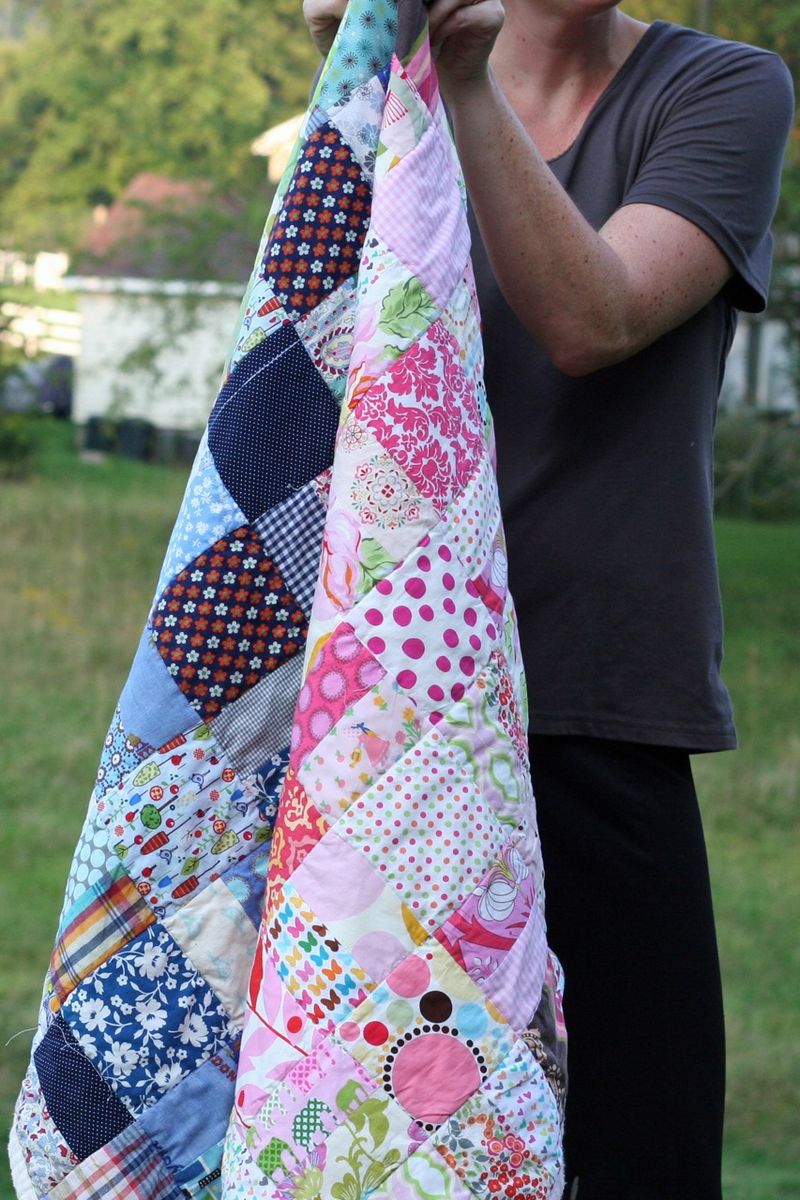
Begin by getting out your bag of scraps in your chosen color. Don't have enough scraps in one color or you don't organize scraps by color? Just gather a bunch of fabrics in one color and don't think too much about how well they do or do not coordinate.
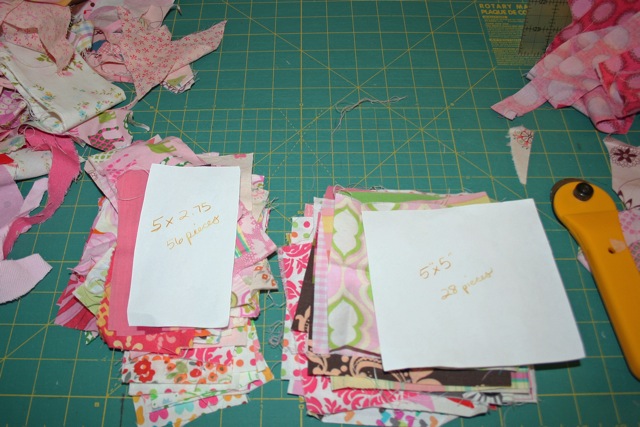
Cut out 2 pieces of paper- one should be 5 x 5" and the other 5 x 2.75". You need to cut 28 of the 5"x 5" and 56 of the 5" x 2.75". Make sure you cut consistently.
You will also need 1 yard of UNWASHED cotton flannel, an iron, sewing machine, rotary cutter and mat, and coordinating thread.
Cut your scraps with the grain! Try to stick with cotton. Sometimes I mix in some vintage sheet scraps that are a poly/ cotton blend and although it works out OK, they do not lay as flat or consistently as the 100% cotton scraps and in the end are a bit more poofy.
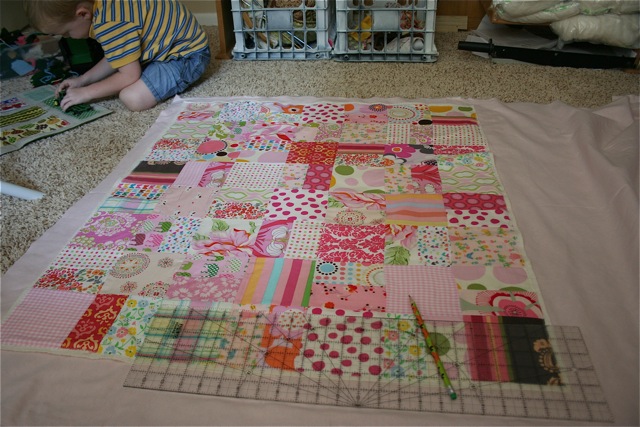
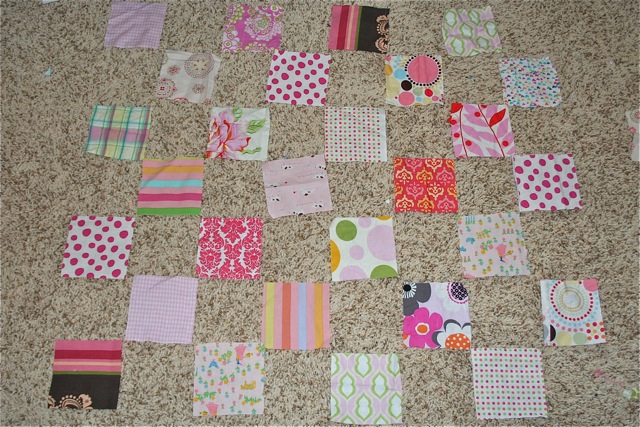
Lay your 5" x 5" pieces out on the floor or a big table top. 7 rows and 4 big blocks to a row. Leave space for the smaller pieces in between. It should look like the photo below. Although I said earlier not to pay too much attention to the colors, do use some strategy about lights and darks, prints, stripes, polka dots, etc. Make a quick attempt to spread them out evenly.
Next add the smaller pieces. I like to alternate the small pieces going horizontal on one row and then vertical on the next. Just adds a little more interest! Again, use some quick strategy about lights and darks. See the picture below…
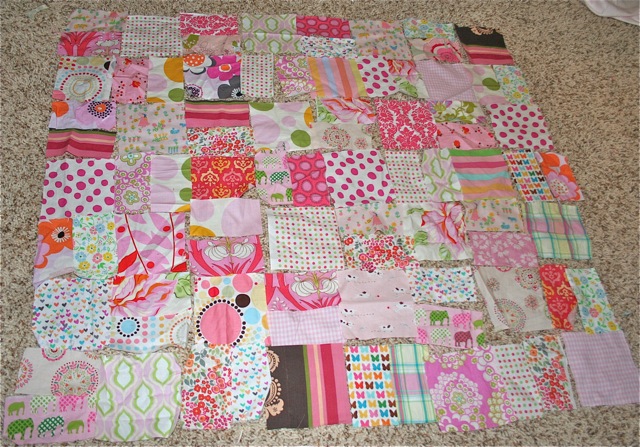
Next start sewing your pieces all together. Attempt to keep the design intact as you sew, starting with the bottom row and then moving on to the next one. I usually move the entire row up to my sewing desk, complete the row, place it back on the floor and move on to the next row. Sew all pieces together with a 1/4" seam allowance. BE CONSISTENT with your seam allowance. This really helps all you pieces come together nicely in the end. Also, back stitch and clip your threads as you go.
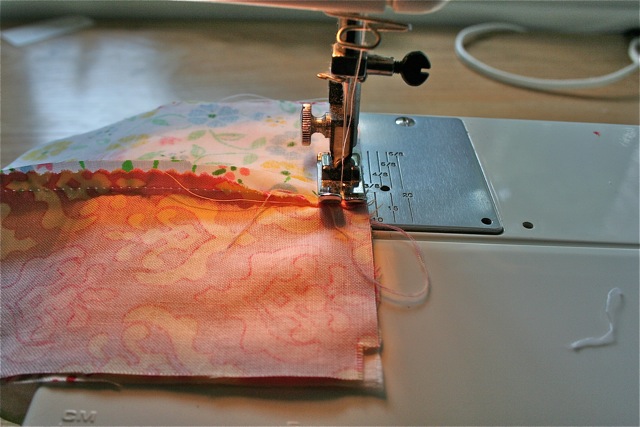
I like to finger press my seam out as I go since it makes for easy ironing in the end.
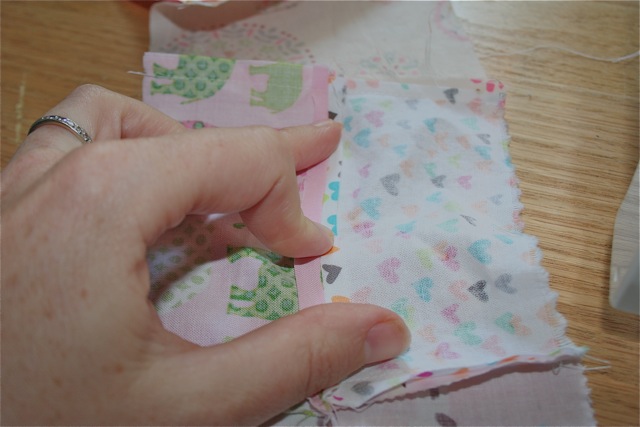
Once you have moved through all 7 rows, you will need to attach them all together. I usually do 2 at a time and then attach the sections together until I have the entire quilt top finished.
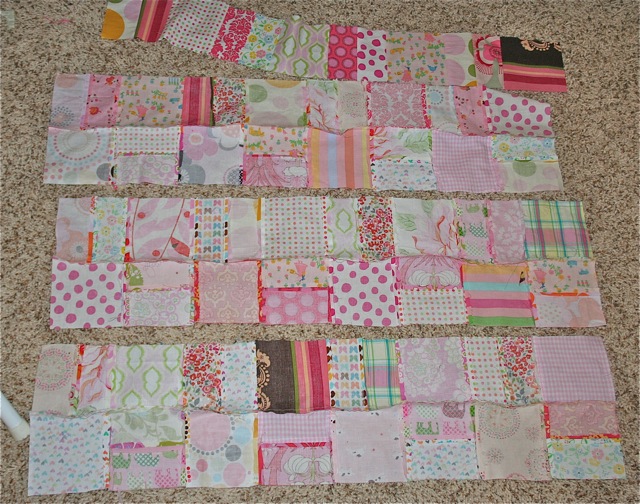
Iron out the entire quilt top until all your seams are laying nice and flat. Since your worked your way through systematically and you were consistent with the 1/4" seam allowance, everything should have fit together nicely. I admit that I usually have some seams that don't fit together perfectly and if it is more than a 1/4" off, I usually go back with my seam ripper and fit is up. Otherwise, just keep moving through and it really wont make a big difference.
Next, cut out a piece of cotton batting that is 1/4- 1/2 bigger than the quilt top all around the edge. Iron these 2 pieces together and use your hand to spread the quilt top over the batting so it is nice and flat.
Pin the 2 pieces together all around the edge and some in the middle- may be about 15 to 20 pins all together.
Over to your sewing machine and do a large zig zag stitch all around the outside of the quilt top to attach it to the cotton batting.
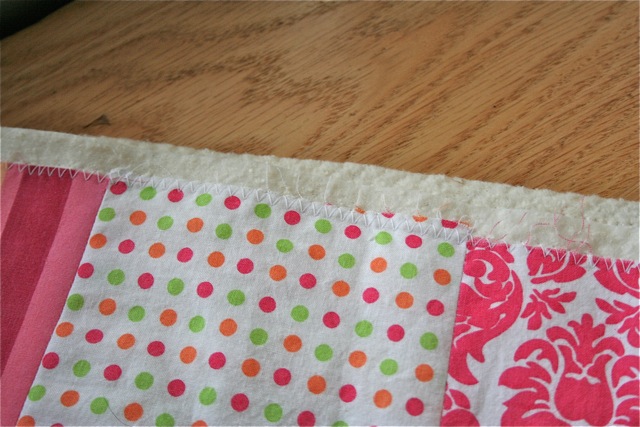
Take your rotary cutter and trim the cotton batting so it is nice and straight and the corners are 90 degrees.
Next, take your yard of UNWASHED flannel and lay it on the floor or big table. Iron it if it is wrinkled. Ue your hands to make sure it is nice and flat . Lay the quilt top (attached to the batting now) on top. I usually line it up to a corner, and measure 1.5" away. The flannel needs to be 1.5" larger than the quilt top all the way around. I use a pencil and my large, clear ruler to mark a straight line. Have your 3 year old play with his tractors and your felt scraps while you work :).
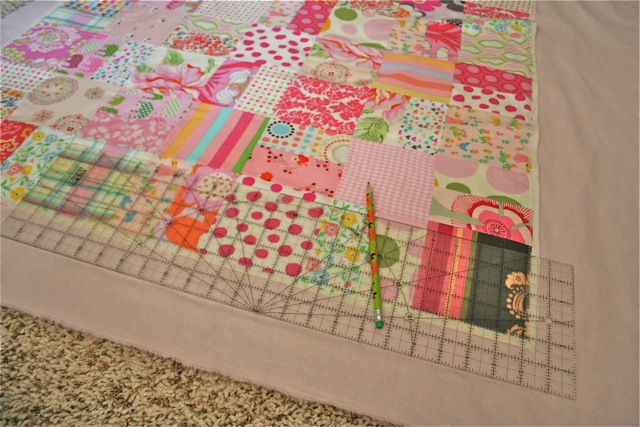
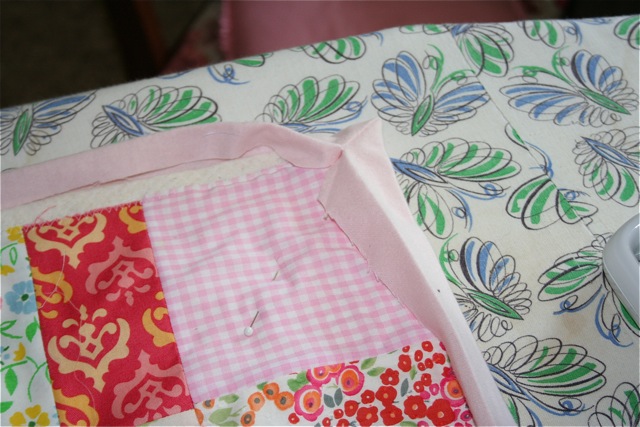
Now cut the flannel along those pencil line you drew. Change all those pins to go through the flannel also. Move over to your ironing board and we will create the binding by folding this extra flannel over the quilt top. Beginning on one side iron the flannel down toward the quilt top so that the raw edges face each other. See the picture below…
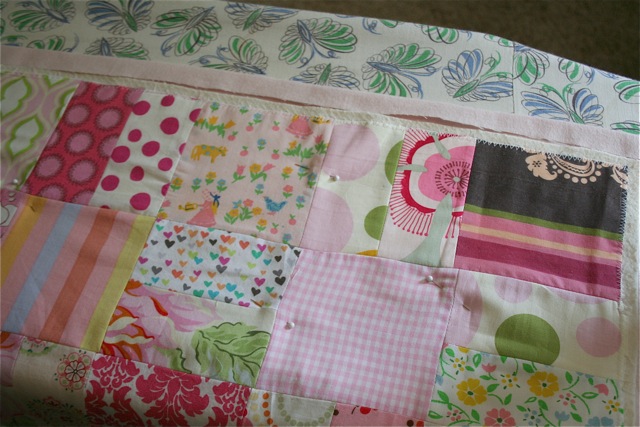
Then iron it over again so that the flannel folds over the raw edge of the quilt top.
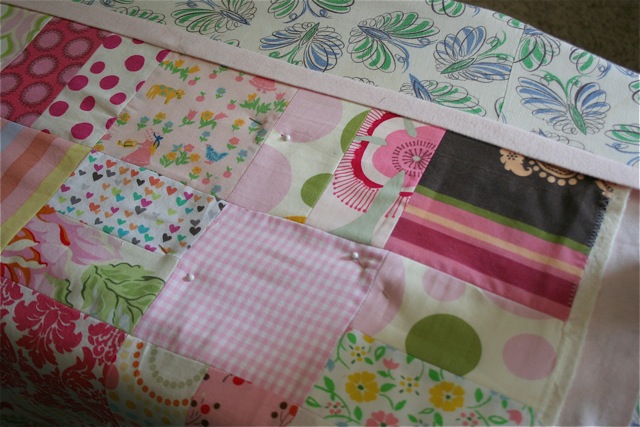
Nice! Move to another edge and do the same. Make sure you iron the corners well since you need to use the creases made by the iron to make your mitered corners.
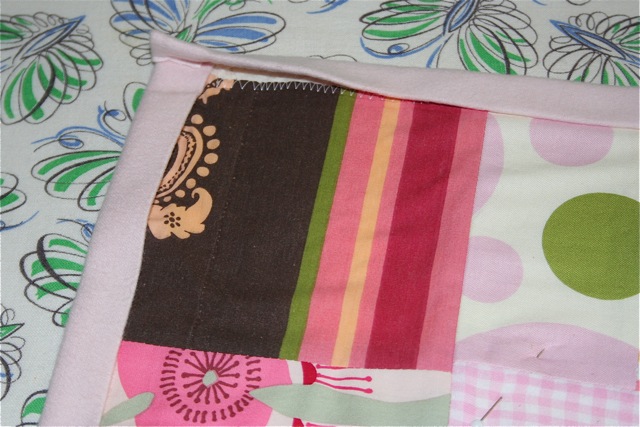
Sorry my ironing board cover is so busy and distracting! Once you have all 4 sides ironed this way, choose one of the corners and unfold it back out.
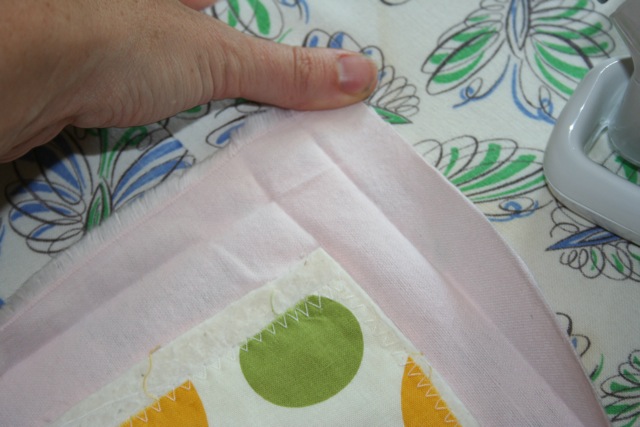
See all those creases made by the iron? They will come in handy here. Next, fold the flannel back under so that the corner is now a straight diagonal line.
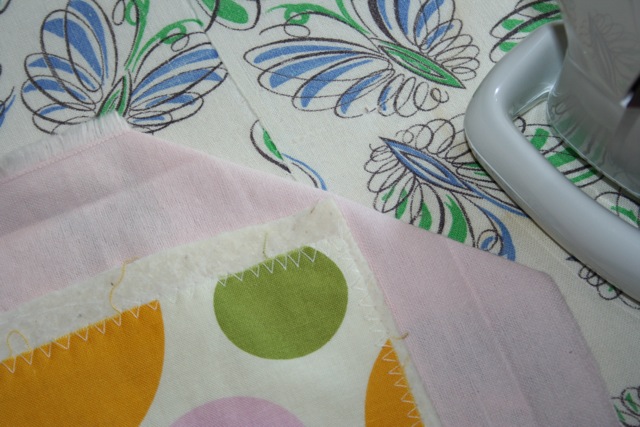
Unfold it again and you will have created another useful crease.
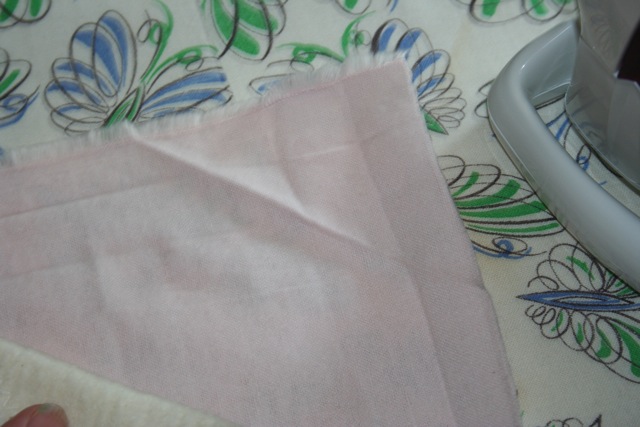
In the picture above I have the quilt top folded down but that diagonal crease lines up perfectly with the corner of the quilt top. Make this fold on all 4 corners of the quilt.
Next, pinch the corners together, facing away from the quilt top, and place a pin to hold it together at the crease in the middle of the pinch. That sounds confusing but just pinch it backward and hold in place with a pin where the crease goes through the middle
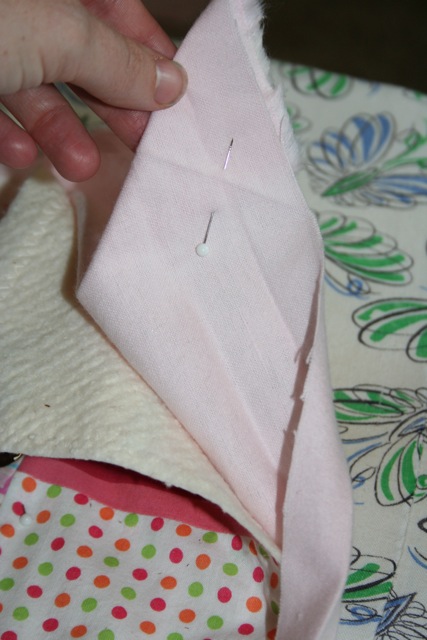
Go over to your sewing machine and sew along the diagonal crease from the folded edge to the pin. The quilt top is still attached but just folded away to make room to sew down the corner. Backstitch and clip your threads.
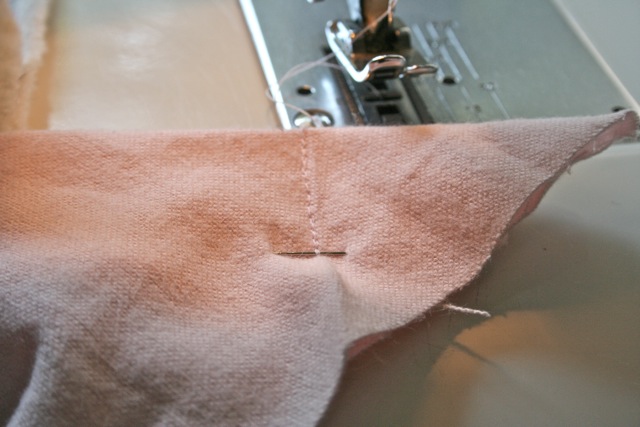
Trim off the top edge and do a tiny trim at the corner.
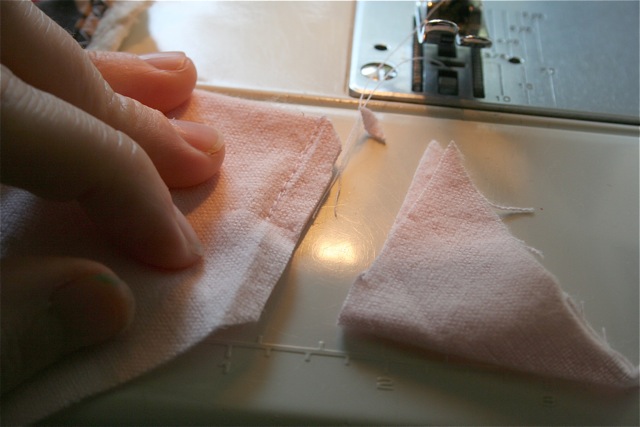
Now lay the quilt top back down and use your finger and a chopstick to poke the corner out.
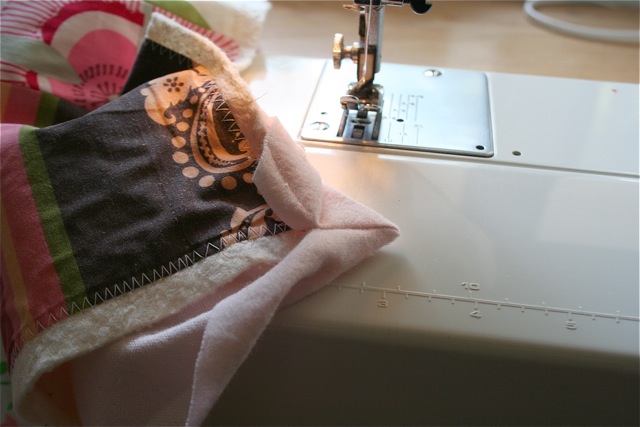
What a pretty mitered corner we are making! over at the ironing board, before you iron it should look like this…
and then when ironed back to its original folds, it should look like this…
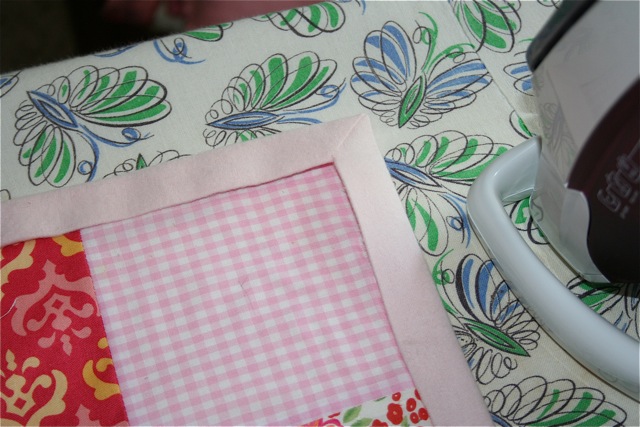
Lovely! The first time I did this, I used this tutorial for cloth napkin corners. It is well explained if you feel confused by my instructions. I had to look at it over and over again to finally get it right. Once you do it correctly though, you realize how simple it is!
Do all 4 corners the same way. This step is optional but helpful- take out all your pins and iron the piece flat again. Watch for too much material under a binding fold or too little. Make adjustment if needed. There isn't usually much, especially if your ironed well before and used enough pins and used your hands to smooth things out several time. When everything is smooth again, put the pins back in again, plus some more! You should have pins about every 6 inches to hold the layers together.
If you have a walking foot (special foot for quilting) use it now to do your own quilting job. I don't have one (although I keep meaning to get one and they aren't expensive) and I just use lots of pins and hold the piece down as I sew.
Start with the binding. I do not use any pins on the binding since the un washed flannel lays nice and flat. I also think the binding kinda needs to move a little to accomoadte the quilt top and the pins hold it in place unnaturally. Sew on with a 1/8" seam allowance. Just a theory though so pin away if you would like!
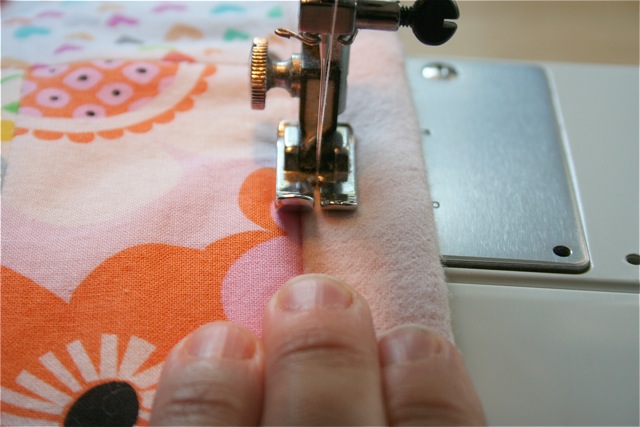
Once your have the binding sewn on around all 4 sides, Now you can start on the quilt top. I usually just "stitch in the ditch" since I don't have a walking foot and I am not an expert quilter! Plus, I like the tidy squares it makes on the flannel side. Start at the first seam between 2 of your cotton squares. Use your fingers to push up that little edge you made on the binding stitch so you begin a little under the binding.
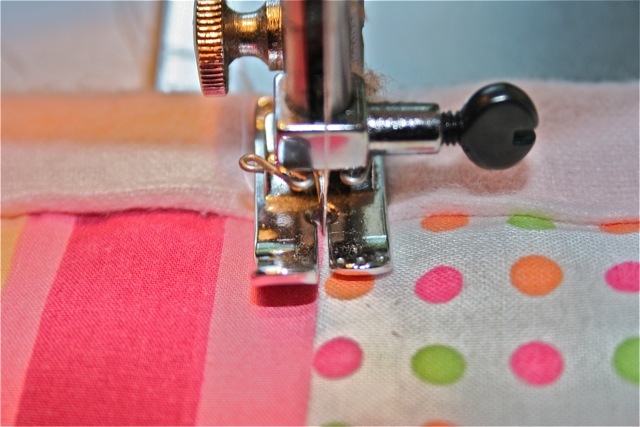
Stitch all the way down that "ditch" to the binding on the other side. Lift that side of the binding up a little and finish your line there with a backstitch. Clip your threads.
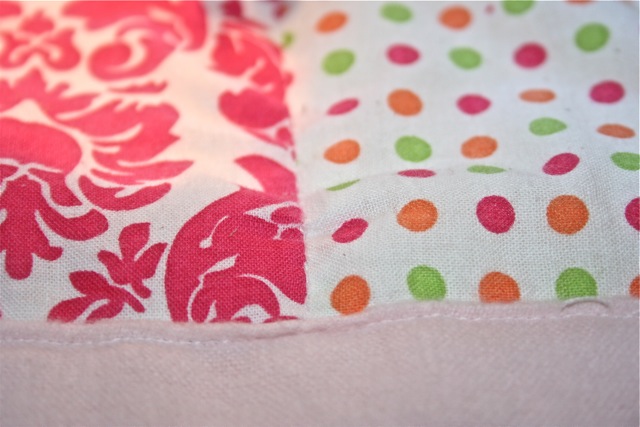
Go all the way across your quilt where the seams of the large squares and the 2.75" x 5" rectangles meet. Then turn the quilt 90 degrees and do the same down those "ditches". When you are finished, you will have a nice boxy grid on the flannel side of your quilt and the quilt will be all sewn together.
IF you have some areas that are not lying flat and there seems to be too much fabric, don't fret too much.
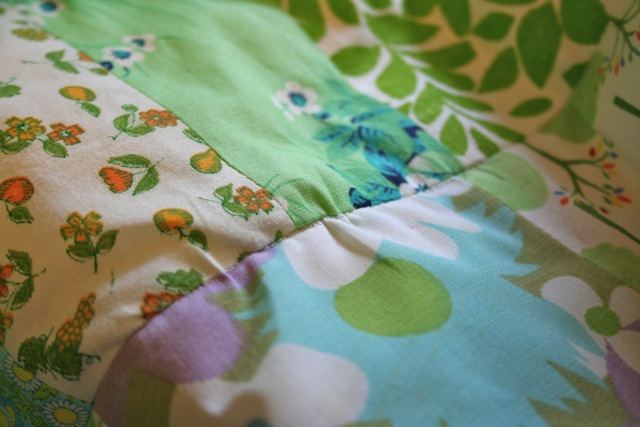
This mostly happens to me where I add some of the poly/ cotton blend pieces as you can see in the picture above with the piece of vintage sheet on my green quilt. Try to spread out the extra fabric instead of having a single larger pinched area. Do this by moving the fabric with your fingers under the sewing machine needle. When you wash the piece after you have it all sewn together, the flannel shrinks a bit and makes these types of areas barely noticeable.
The final step is to wash and dry your quilt. I give mine one last good ironing after the drying and it looks great!
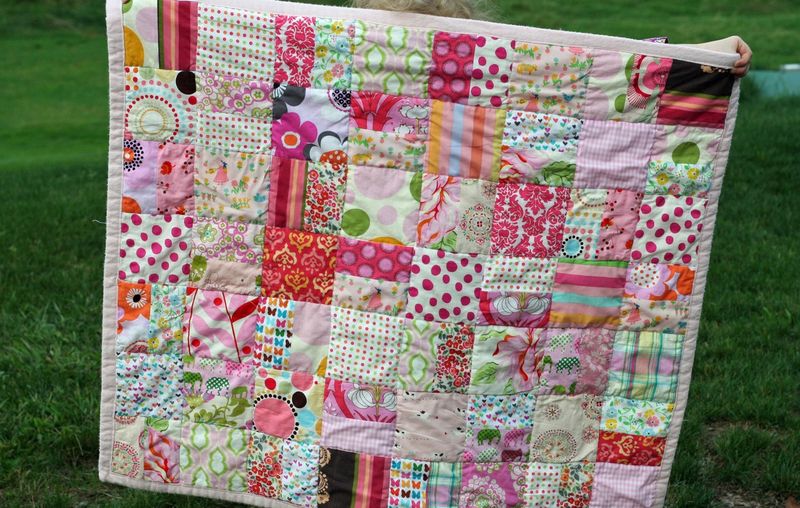
Hope you have some time to make one. It's really fun to create something beautiful out of a pile of fabric scraps! I love to think of all my old projects while I am cutting all the quilt pieces out too. You can also get an idea of your personal style and favorite colors.
My favorite this time around was the blue one I made. My mom asked if I had anything sewn for boys since she needed a gift for a new baby and I told her that no, I didn't, and besides, boy fabrics just are not as cute. I proved myself wrong when I put together all the fabrics in my blue scrap bag…
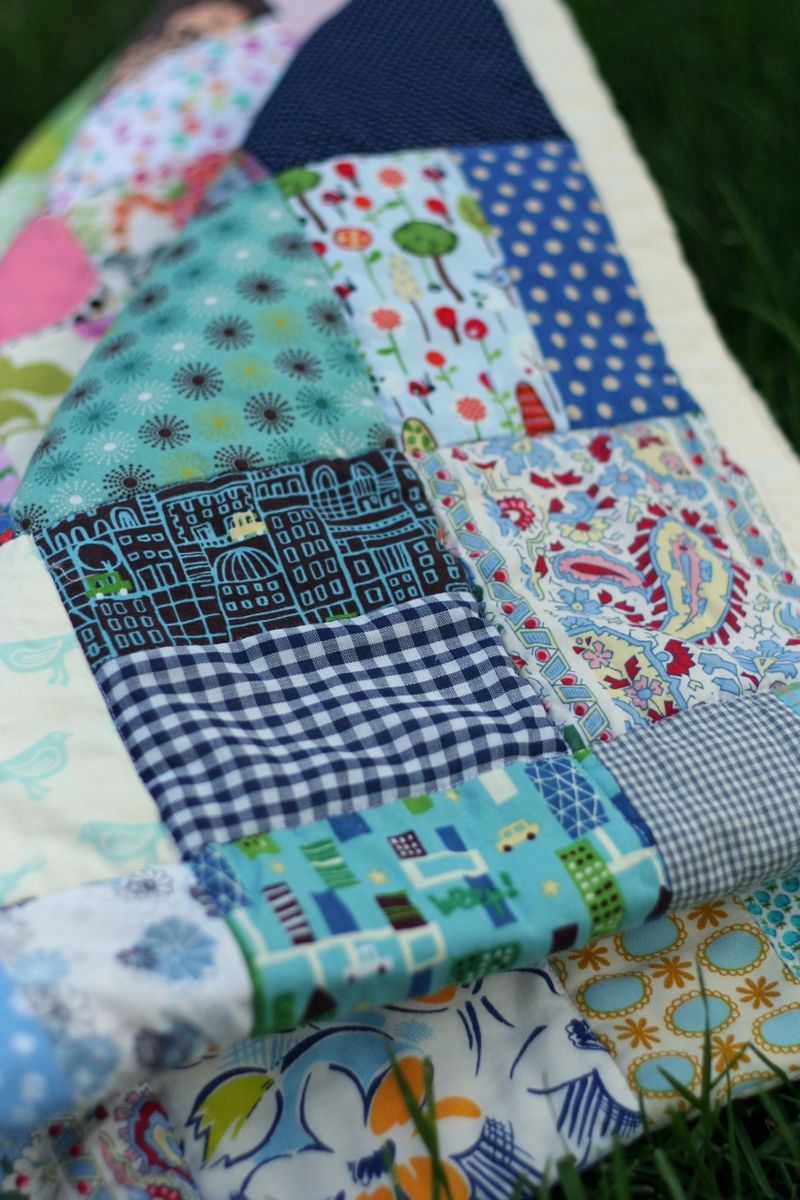
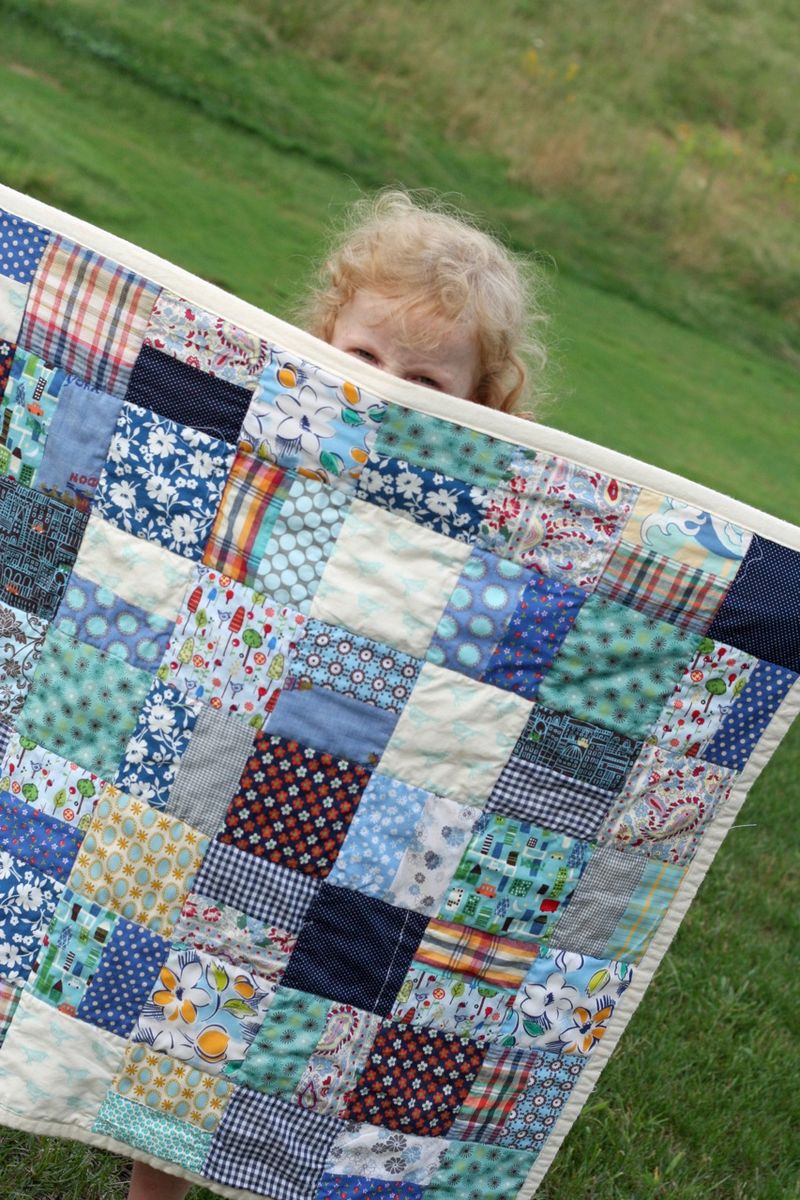
Cute! Please feel free to make as many of these as you would like for family and friends. If you do make one, I would love to see it in my Gingercake tutorials Flickr Group.
