I am not much of a Halloween or Harvest decorator. If I could choose team colors they would for sure be red and green. That said, my really good pal Karen asked if I would make her a pumpkin. She wore me down and now we have this really cute fabric pumpkin tutorial!
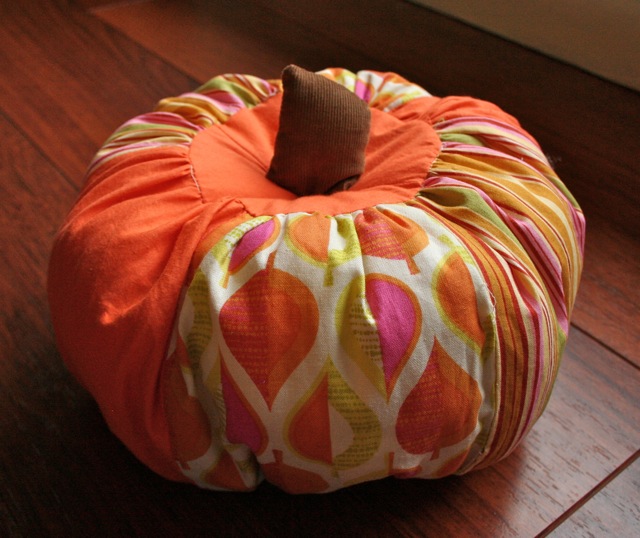
Here are the pumpkins I made…
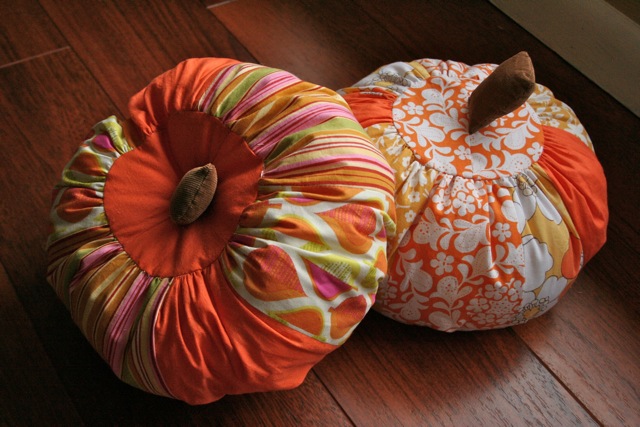
I made one and then thought it was so fun and easy that I would make a quick tutorial. Here goes…
I made patchwork but you could do all one fabric or whatever.
UPADATE! I just published a new video tutorial on my Youtube channel for this project! Check it out below…
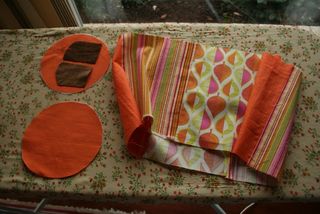
Gather your materials ~
6 pieces of 6″ x 8.5″ (or 8 4.5″ by 8.5″) pieces of orange print fabric. Sew them right sides together into a patchwork tube. Press the seams out with your iron.
Cut out 2 circles (from Download Circle for pumpkin) in your fabric choices. Fuse the wrong side with fusible interfacing.
Cut 2 pieces of brown corduroy (or your choice!) that are about 2.75″ high and 2″ wide.
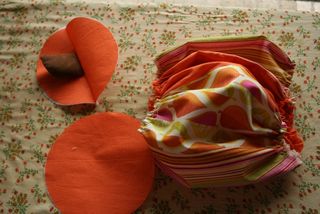
Now sew around the both the top and bottom edges of the tube with your longest straight stitch. Mine is size 7. Then gather both edges evenly. You’ll have to mess around with this a bit to get it the perfect size but if you are technical, this circle has a circumference of 15.7″. I just kind eye it up and make my gather bigger or smaller when i pin the circle on next.
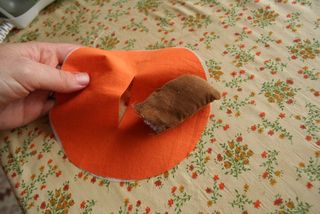
You can also see in this picture how I did the stem. Sew those 2 pieces of corduroy together, right sides facing. I like to make the top edge kinda curved but this is not neccessary! Trim the edges and then turn it inside out. Stuff a little stuffing in there and push it all the way to the end. You will even this out later.
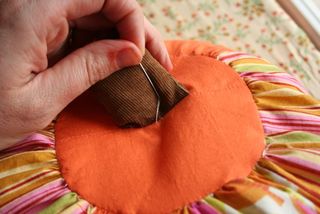
Next cut a slit about 3″ in the middle of one of the circles and insert the stem. See picture below.
To sew it on, turn it over and pin the opening closed. Go ahead and sew all the way across the circle.
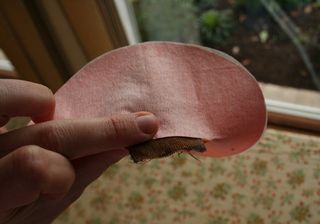
Next you will attach the circle to the gathered tube. Pin wrong sides together all around and adjust if needed by pulling the thread tighter or loosening it as discussed before.
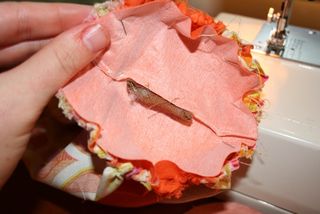
Now carefully sew all around. I sew on the gathered side so that I don’t miss any edges.
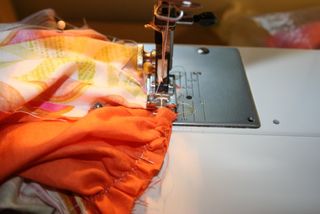
Check and make sure that you got all your edges nice and neat by turning out. Then back outside in again. Trim off all the string and mess.
Repeat with the bottom circle.
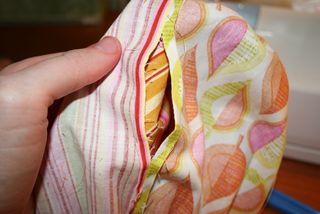
Use your seam ripper to make an opening about 3″ between two of the patchwork panels.
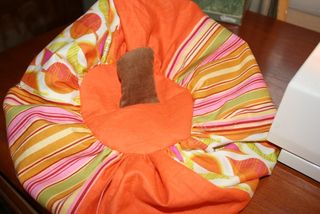
Pull the pumpkin inside out through this opening. Check for any gaps or errors. Turn it back outside in and trim up that bottom circle section. Turn out again. Should look like this…
Now start stuffing! one of my favorite things about this project was that the stuffing can be loose and imperfect! Lumpy is good here! You want to put in enough in to fill it up though.
Now sew up the opening with a blind stitch. Google it if you don’t know how to do this! Very useful little stitch for sure.
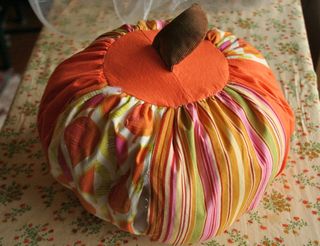
Here you have the option of being finished. Like with this one..
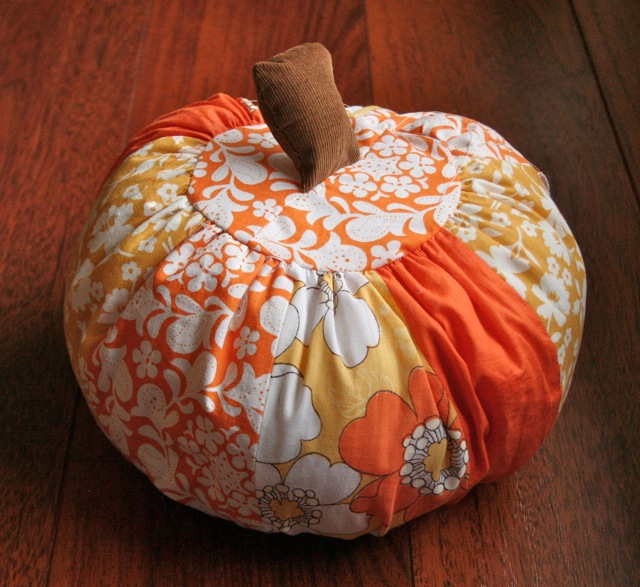
The stem is kinda floppy though so you can make the stem go in by putting a button on the bottom.
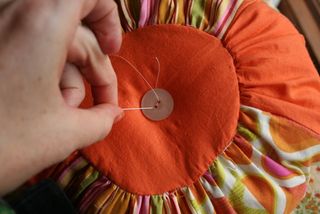
Attach the button securely by looping the thread around 2 or three times. Then take your needle and push it all the way through the pumpkin to the edge of the stem~
Pull the thread through the stem and down through the pumpkin again and through the button. This step may cause you a bit of cursing but stick with it! Pull it as tight as you want to make the stem come down. Go through the button again and repeat so that you go through the stem again. Secure the thread around the button on the bottom. Now it should look like this…
Cute! I may like harvest decorating after all. Thanks for the push to inspiration Karen! Those pork chops are going to be great!!!!!!!!! Which one do you think she will choose?
This is for personal use. Make as many as you want for gifts and yourself. Contact me with further questions!

